Blog

  • Android_Review_8

    Android_Review_8

    Intent to Activity or Context 意圖分享純文本,
    使用 IntentBuilder 取代 Intent

    1. design layout with UI element. And add on Guideline to make a space between ImageView & ImageButton.

      //activity_main.xml
      
      <?xml encoding="utf-8"?>
      
      <layout>
      
          <data>
          
              <variable
                 name="price"
                 type="Integer"
              />
              
              <variable
                  name="volume"
                  type="Integer"
              />
              
          </data>
          
          <androidx.constraintlayout.widget.ConstraintLayout
             tools:context=".MainActivity"
          >
          
          <ImageView
            android:id="img"
            android:scaleType="centerCrop"
            android:srcCompat="@drawable/aaa"
          />
          
          <androidx.constraintlayout.widget.Guideline
             android:id="@+id/ggg"
             android:orientation=""
             app:layout_constaintGuide_end="@dimen/default_spacing"
          />
          
          <TextView
             android:id="@+id/price"
          />
          
          <TextView
             android:id="@+id/volume"
          />
          
          <ImageButton
             android:id="imgB"
             android:scaleType="centerCrop"
             tools:src="https://github.com/QueenieCplusplus/@drawable/bbb"
          />
          
          </androidx.constraintlayout.widget.ConstraintLayout>
      
      </layout>
      
    2. define dimens.

         // go to app/src/main/res/values/dimens.xml
         
         <?xml encoding="utf-8"?>
         
         <resources>
             <dimen name="default_spacing"> 16dp </dimen>
         </resources>
      
    3. define customed color.

          // go to app/src/main/res/values/colors.xml
          
          <?xml encoding="utf-8"?>
          
          <resources>
          
             <color name="white">#ffffff</color>
             <color name="green">#6ab343</color>
             <color name="grey">#99000000</color>
             
          </resources>
      
    4. define resorces in app/src/main/res/drawable.

    5. design menu resource.

      // go to app/src/main/res/menu
      // main_menu.xml
      
      <?xml encoding="utf-8">
      <menu>
         <item
             android:id="@+id/showMenuTouch"
             android:icon="?android:attr/actionModeShareDrawable"
             android:visible="true"
             andrdoid:enable="true"
             android:showAsAction="ifRoom"
         />
      </menu>
      
    6. to create a R.string which is located in file called string.xml under dir res/values/.

      <resources>
          <string name="app_name">Kates App</string>
          <string name="dollar_sign">$</string>
          <string name="zero">0</string>
          <string name="garmin">Garmin Watch</string>
          <string name="share_text">I\'ve clicked %1$d Desserts for a total of %2$d$ #AndroidDessertClicker</string>
          <string name="share">Share</string>
          <string name="sharing_not_available">Sharing Not Available</string>
      </resources>
      
    7. source line of code.

      package com.example.android.katesapp
      
      [default module]
      import android.os.bundle
      import androidx.appcompat.app.AppCompatActivity
      
      [databind module]
      import androidx.databinding.DataBindingUtil
      import com.example.android.katesapp.databinding.ActivityMainBinding
      
      [intent module]
      import androidx.core.app.ShareCompat
      
      [system error handler module]
      import android.content.ActivityNotFoundException
      
      [menu module]
      import android.view.Menu
      import android.view.MenuItem
      
      [Toast module]
      import android.widget.Toast
      
      class MainActivity: AppCompatActivity(){
      
         
           // 類別中的共用變數
           private var price = 0
           private var volume = 0
           private lateinit var binding: ActivityMainBinding
           
           
           // 製作資料型別
           // data class garminWatchToBuy(val)
           
           // create a Data Type
           // Data Class
           // it includes the resource id.
           data class garmin3C(val imgId: Int, val price: Int, val volumn: Int)
           
           // 建立集合裝載資料型別的成員
           // create a List
           // 拆解集合為成員
           private val allGarmin3C = listOf(
           
              garmin3C(R.drawable.watchA, 6990, 5),
              garmin3C(R.drawable.watchB, 7990, 15),
              garmin3C(R.drawable.watchC, 19900, 20)
           
           
           )
           
           
           // 提取集合中的成員,成員有 id、價格、數量等屬性
           private var currentWatch = allGarmin[0]
      
           override fun onCreate(savedInstanceState: Bundle?){
           
                super.onCreate(savedInstanceState)
                
                // 綁定 UI 元件
                binding = DataBindingUtil.setContentView(this, R.layout.activity_main)
                
                // 顯示 UI 元件
                binding.imgB.setOnClickListner {
                    clickBuyHandler()
                }
                
                binding.imgB.setImageResource(currentWatch.imgId)
                
                binding.price = price
                binding.volumn = volumn
          
                
           }
           
           private fun clickBuyHandler() {
              
              // update value of volumn when user click on the button to demonstrate he/she wanna buy it
              volumnAfterBuy--
              
              binding.volumn = volumnAfterBuy
              
              showOtherWatch()
           
           
           }
           
           private fun showOtherWatch() {
           
                // TODO
                // for-in loop
                // use the data class called allGramin3C
                // retrieve the gramin3C data by creating a varibale calling allGramin3C[0]
                // see Anroid_Review_7
           
           } 
           
           // Menu to be inflated
           override fun onCreateOptionsMenu(menu: Menu): Boolean {
           
              menuInflater.inflate(R.menu.main_menu, menu)
              return super.onCreateOptionsMenu(menu)
              
           }
           
           // Items to be selected
           override fun onOptionsItemSelected(item: MenuItem): Boolean {
           
              // lambda
              // (itemId) -> {body}
              // {itemId -> body}
              when(item.itemId){
                  R,id.showMenuTouch -> showGarmin()
              }
              return super.onOptionsItemSelected(item)
           
           }
           
           // ShareCompat is a public class
           // its IntentBuilder is a constructor
           // then call its methods and properties
           // Intent 
           // Exception Handler
           private fun showGarmin() {
           
                // Intent
                // setText(CharSequence text) 
                // Set the literal text data to be sent as part of the share.
                // Question on getIntent() instead of .intent
                
                val showIntent = ShareCompat.IntentBuilder.from(this).setText(getString(R.string.share_text, price, volumn)).setType("text/plain").intent
                
                try {
                
                    startActivity(showIntent)
                
                } catch(ex: ActivityNotFoundException) {
                
                    Toast.makeText(this, getString(), Toast.LENGTH_LONG).show()
                
                }
           
           }
                  
      
      }
      
    8. today’s tip (getString())

      https://cloud.tencent.com/developer/ask/72642

    9. today’s tip (field)

      %1$d , the first filed that holds integer type variable
      %2$s , the second field that holds string type varibale

      https://stackoverflow.com/questions/3656371/is-it-possible-dynamically-to-add-string-to-string-xml-in-android

      https://blog.csdn.net/wufen1103/article/details/7846691

    10. today’s tip (constructor)

      1. constructor can’t be called directly.

      2. constructor has no param.

      3. before instance is created, we use constructor instad to ref the members.

      https://stackoverflow.com/questions/4506990/what-is-the-use-of-static-constructors

    11. today’s tip (CharSequence & String)

      https://stackoverflow.com/questions/3600635/what-is-the-difference-between-charsequence-and-a-string

    12. android’s tip (IntentBuiler 意圖建構器)

      1. 先導入模組 androidx.core.app.ShareCompat.IntentBuilder。

      2. 我們使用此模組,目的是建造一個 IntentBuilder 的型別的實例。

      3. 因建構子無法單獨使用,故先呼叫公共類別 SharCompat 與建構子 .IntenBuilder。

      4. 建構子成立後,可呼叫內部成員方法,如

        setText(@Nullable text: CharSequence?): IntentBuilder

        setType(@Nullable mimeType: String?): IntentBuilder

        setStream(@Nullable streamUri: Uri?): IntentBuilder

        // HTML markup

        setHtmlText(@Nullable htmlText: String?): IntentBuilder


        from(@NonNull activity: Activity): IntentBuilder

        startChooser(): void

        getInetent(): Intent

        setSubject(@Nullable subject: String?): IntentBuilder

        setEmailBcc(@Nullable addresses: Array?): IntentBuilder

        setEmailTo(@Nullable addressess: Array?): IntentBuilder


      https://developer.android.com/reference/kotlin/androidx/core/app/ShareCompat.IntentBuilder

    13. android’s tip (Intent 意圖)

      ————Main2Activity.java——————–

      //使用 putExtra(), getExtra() 夾帶資料

          EditText et;
          et = fincdViewById(R.id.edit_text);
          // et.getText().toString() or getString(et)
          String Msg = et.getString();
          Intent anotherIntent = new Intent(MainActivity.this, Main2Activity.class);
          anotherIntent.putExtra("I luv android since 2018", msg)
          // setResult(2, anotherIntent);
          startActivity(anotherIntent);
      

      ————MainActivity.java———————–

          // onCreate()
          Intent intent = new Intent(MainActivity.this, Main2Activity.class);
          startActivityForResult(intent, 2)
          
          // onActivityResult()
          // if requestCode ==2
          String msg = data.getStringExtra("");
          txv.setText(msg)
      

      https://medium.com/@skywing0527/android自學筆記-14-intent用法-範例練習-ad774d2f92ec

    Visit original content creator repository
    https://github.com/QueenieCplusplus/Android_Review_8

  • tv-display

    City Facility TV Displays

    Seniors TV Display at the Northern Community Centre

    The City of Sault Ste. Marie uses an in-house system to display content on several display boards located at various City facilities. The most prominent display that uses the in-house system is the one in the Civic Centre lobby.

    This is not a digital signage or kiosk operating system, but rather a simple “webpage” that can run through a series of content items.

    As we expand our footprint, we are cleaning up the code associated with displaying the content, and releasing it for the benefit of others.

    Sample Configurations

    The content that is displayed is driven by a config file. Config files are written in JSON. They can be dynamically generated from a database table or other source, however, that implementation is not here (yet).

    Setup Instructions

    The TV Display application can be run from pretty much any web server. The application can be viewed from pretty much any web browser.

    To avoid overloading this repository with heavy screenshots, documentation can be found in its own repository, cityssm/tv-display-docs.

    Visit original content creator repository https://github.com/cityssm/tv-display
  • email-archiver

    Discord

    This project is currently in early development, and things may break unexpectedly.

    Briefbox

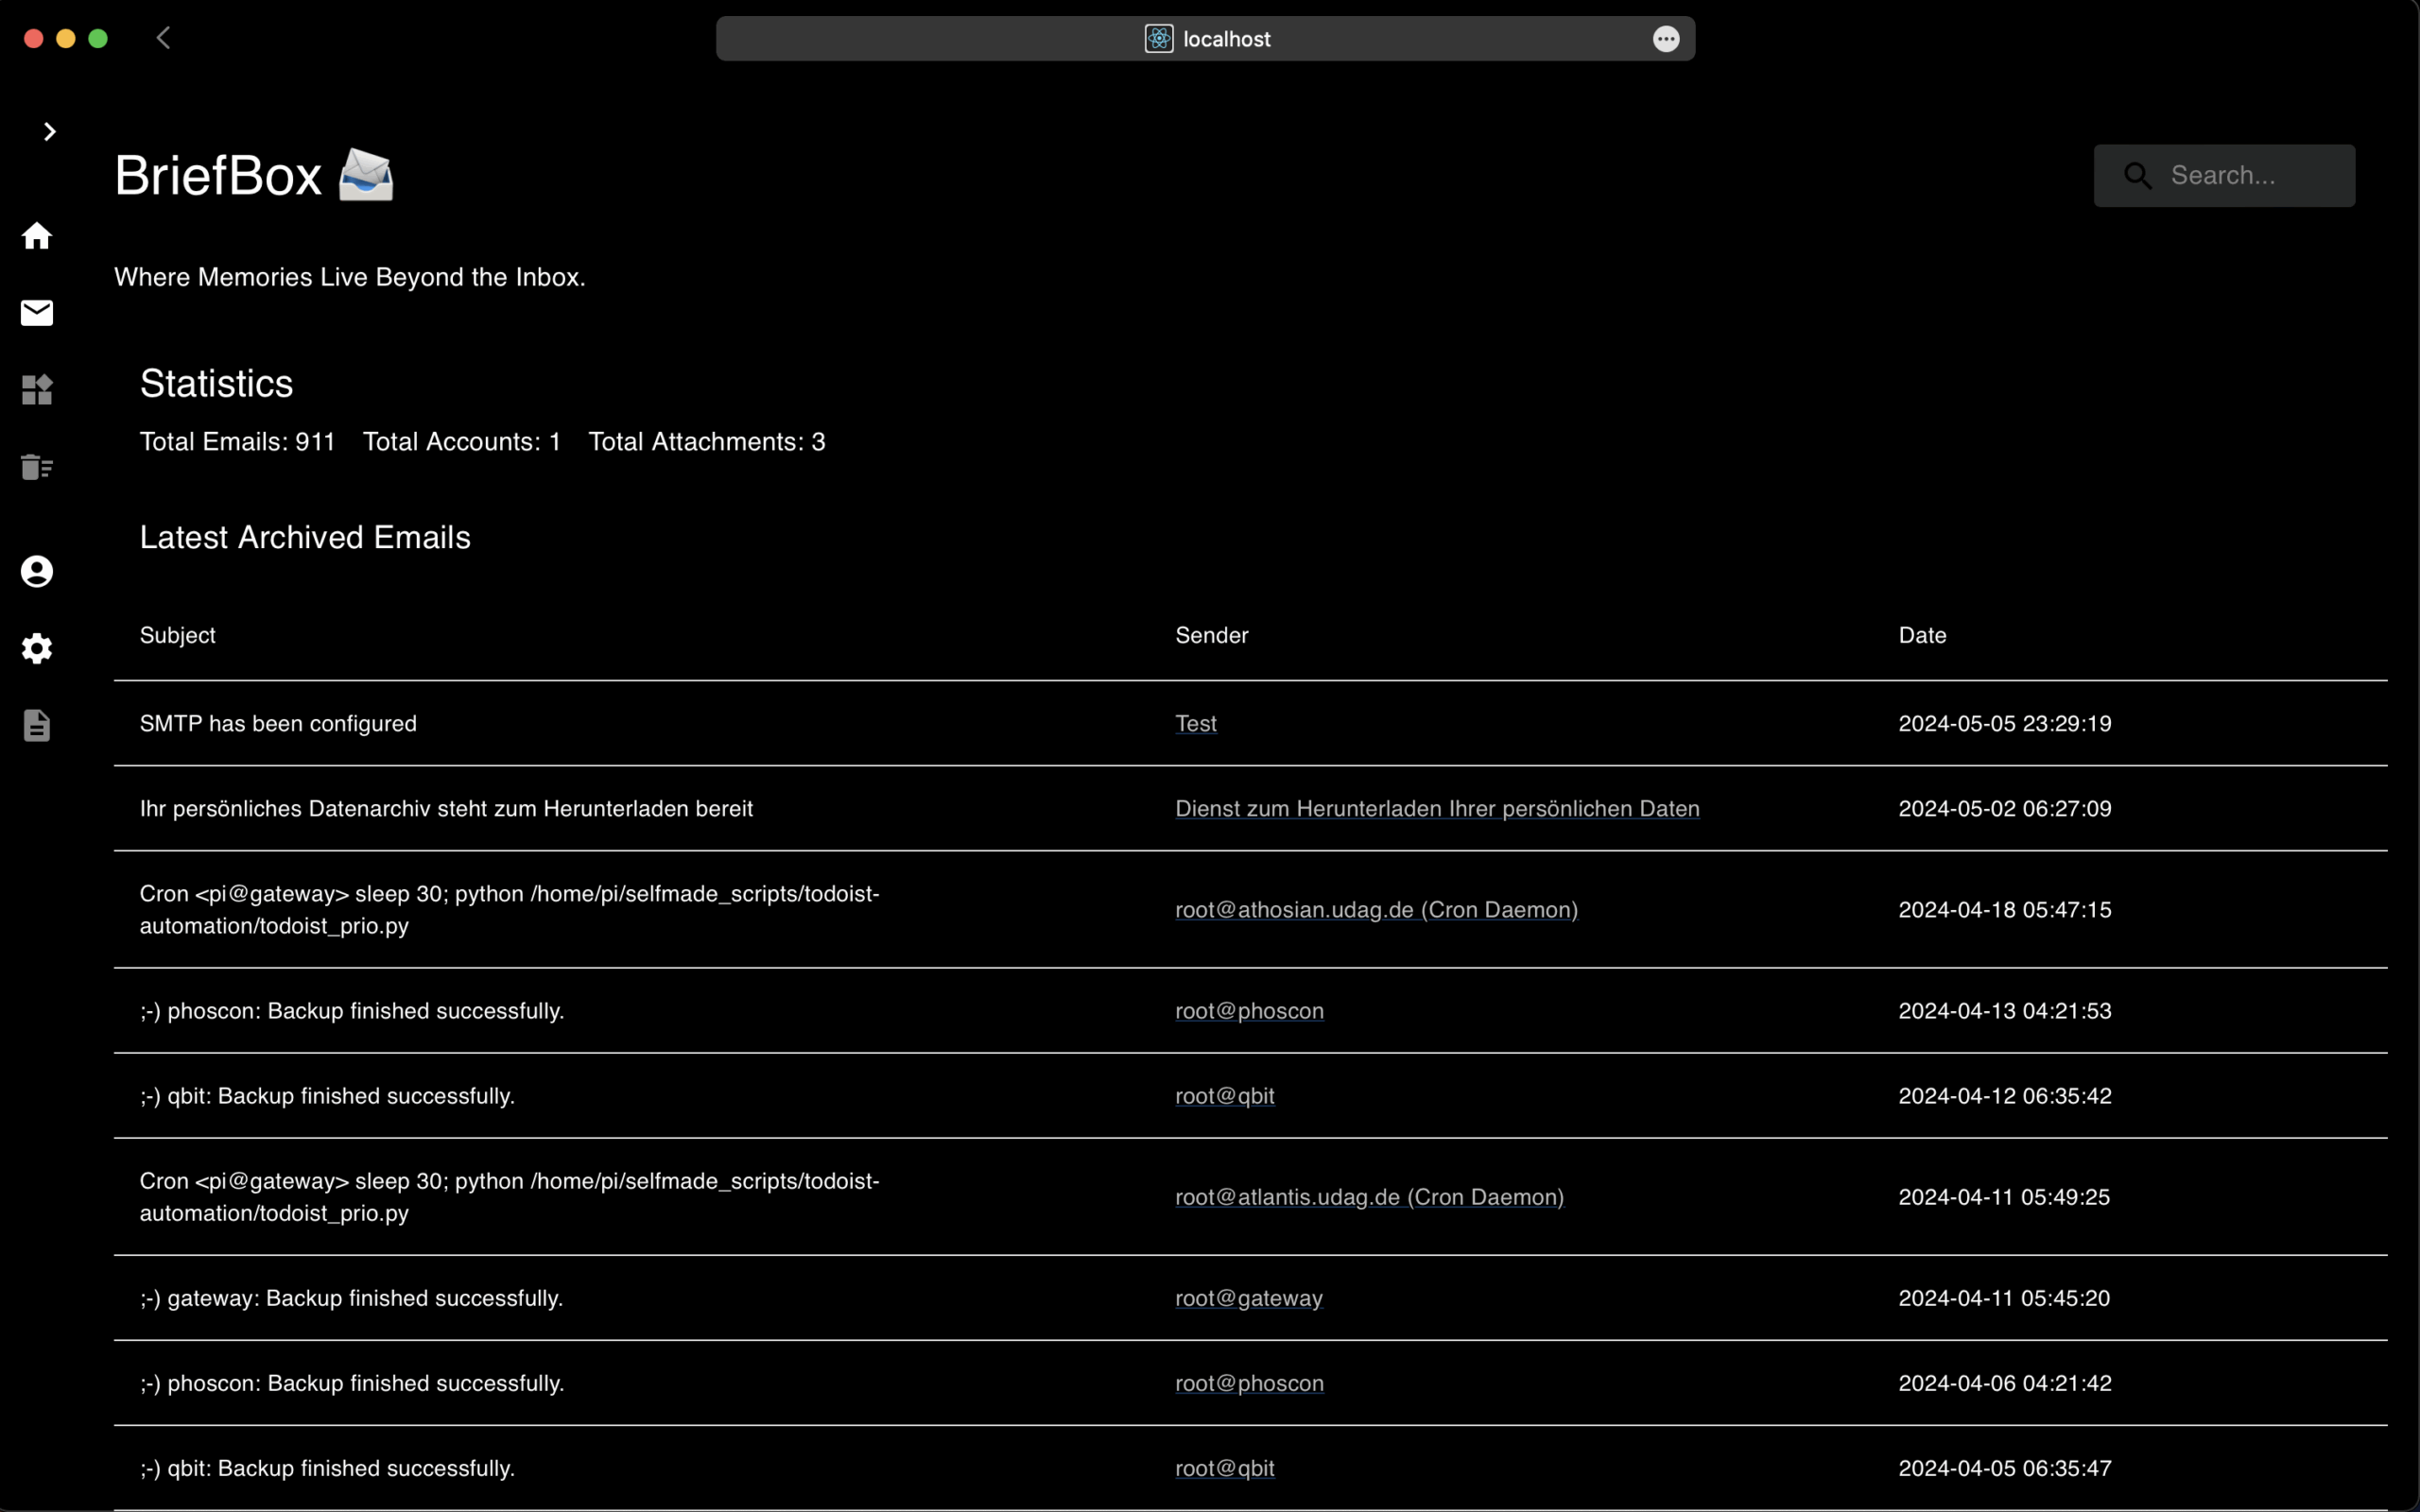
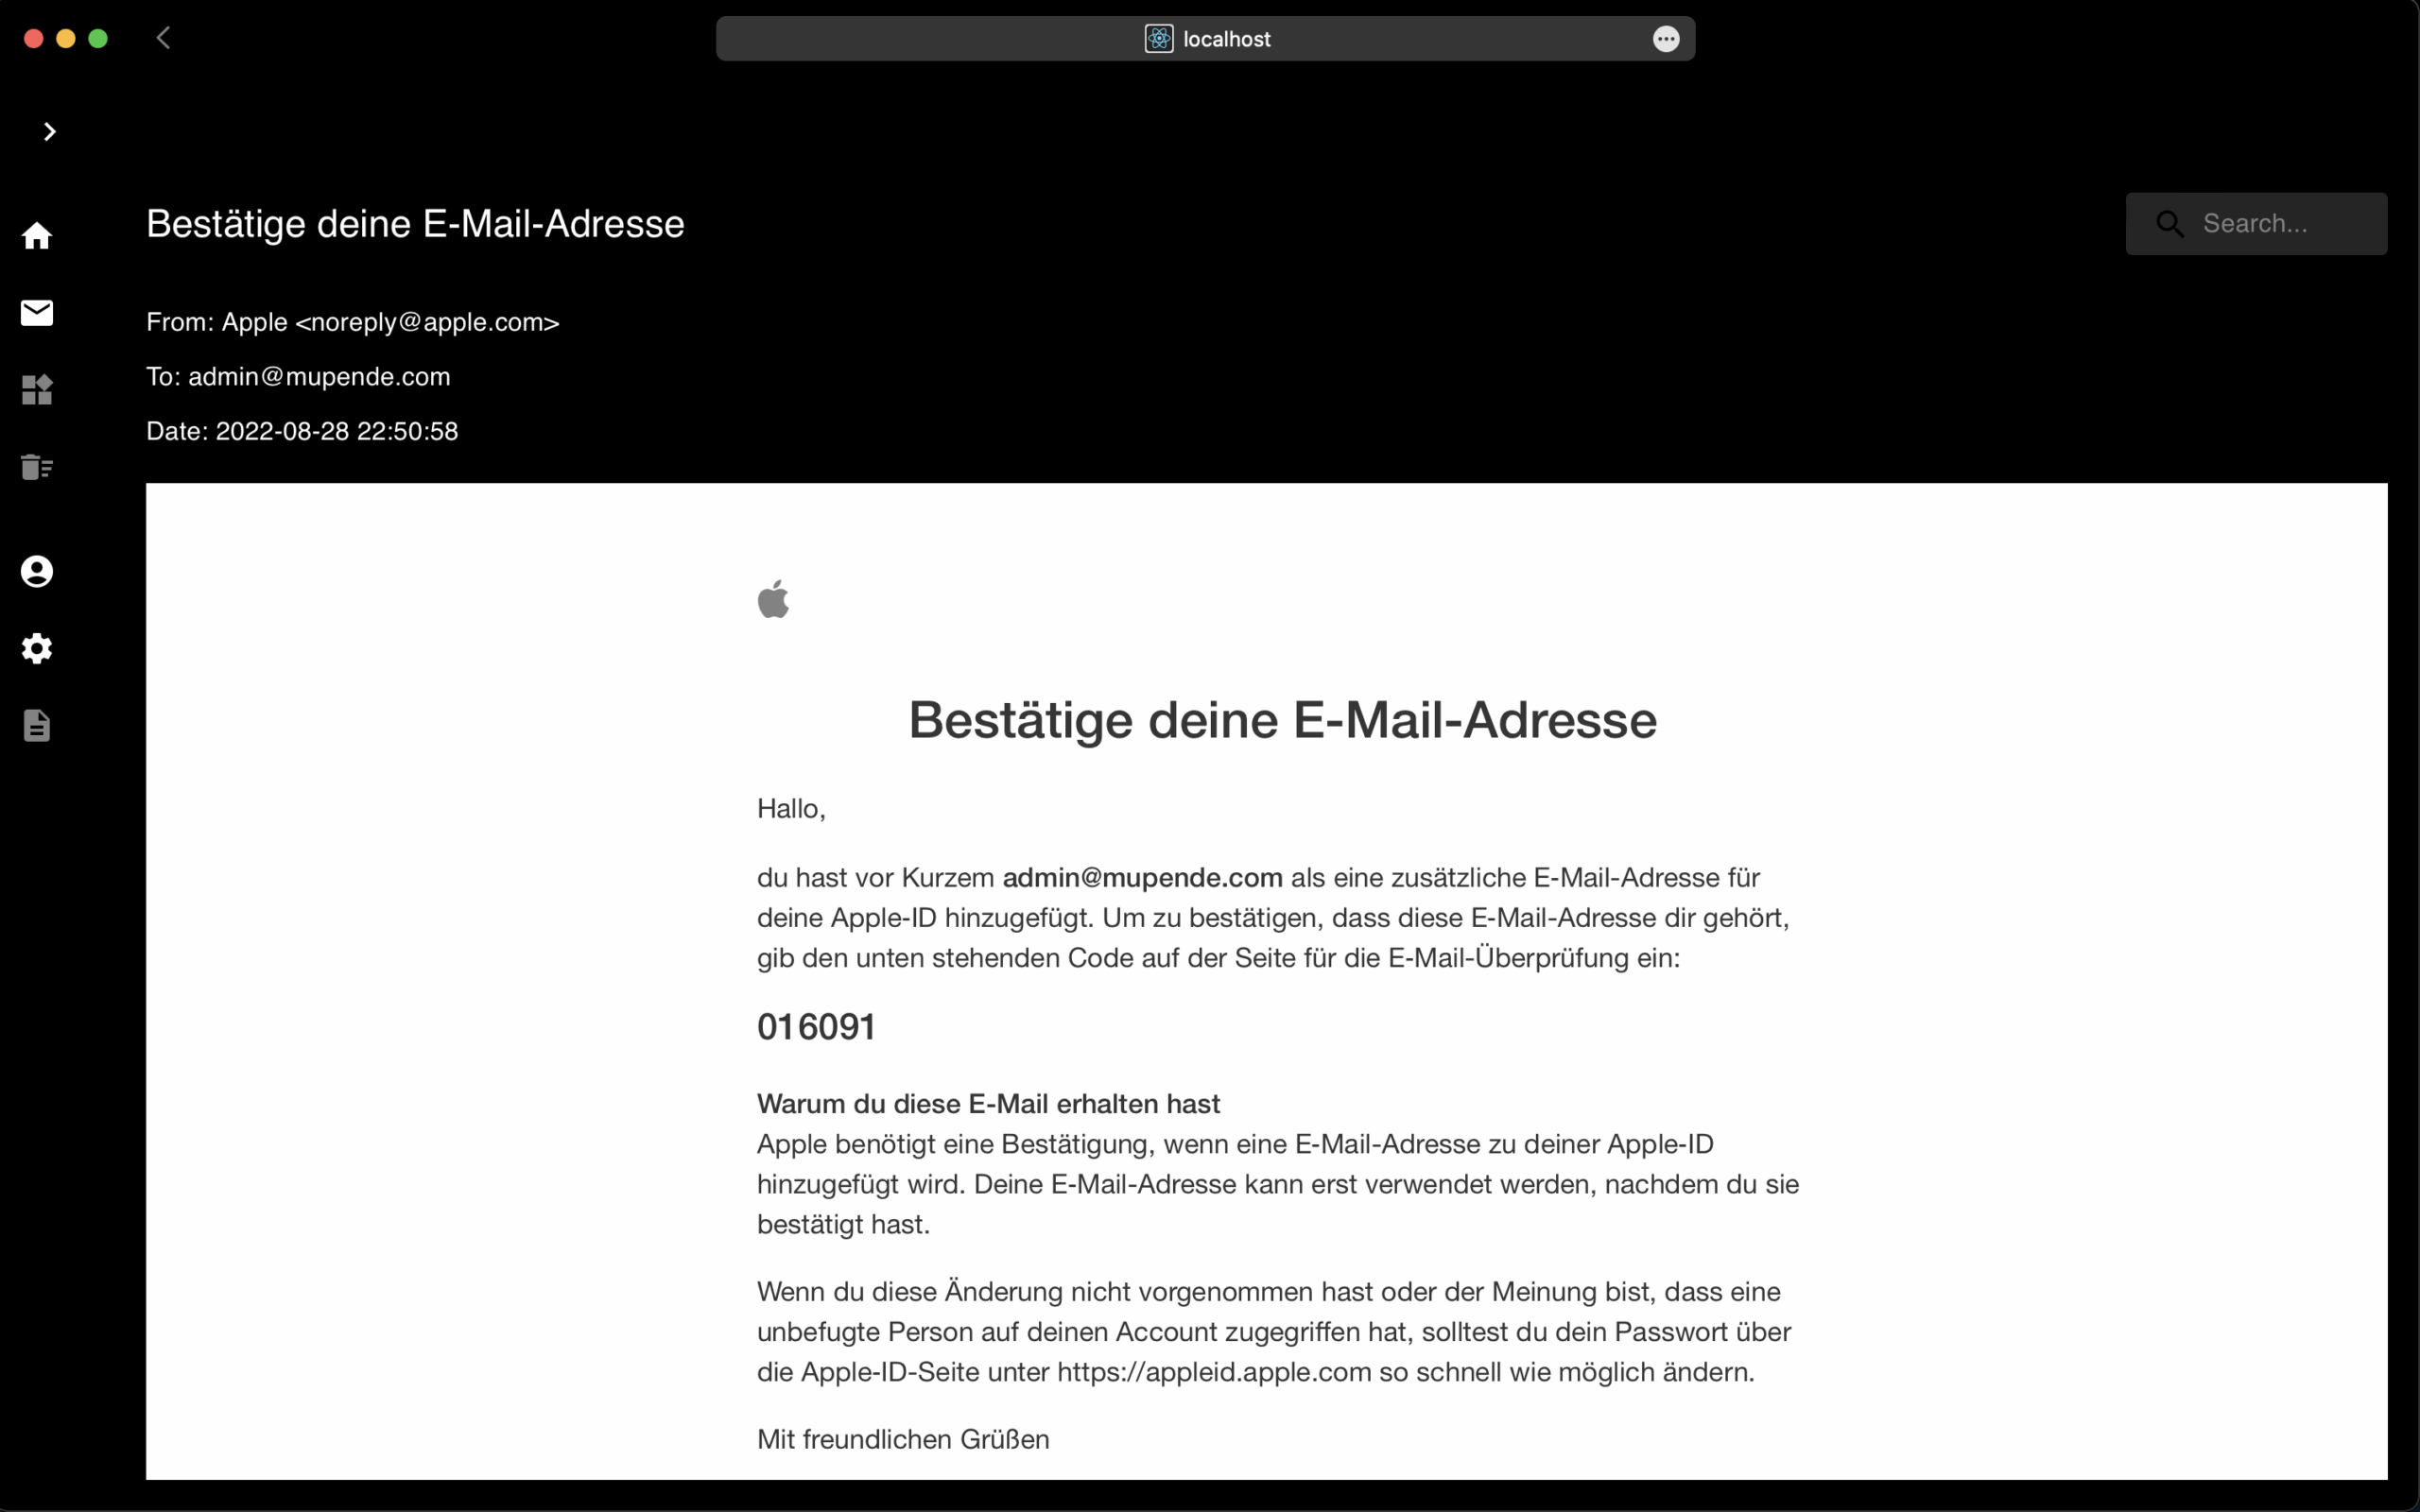
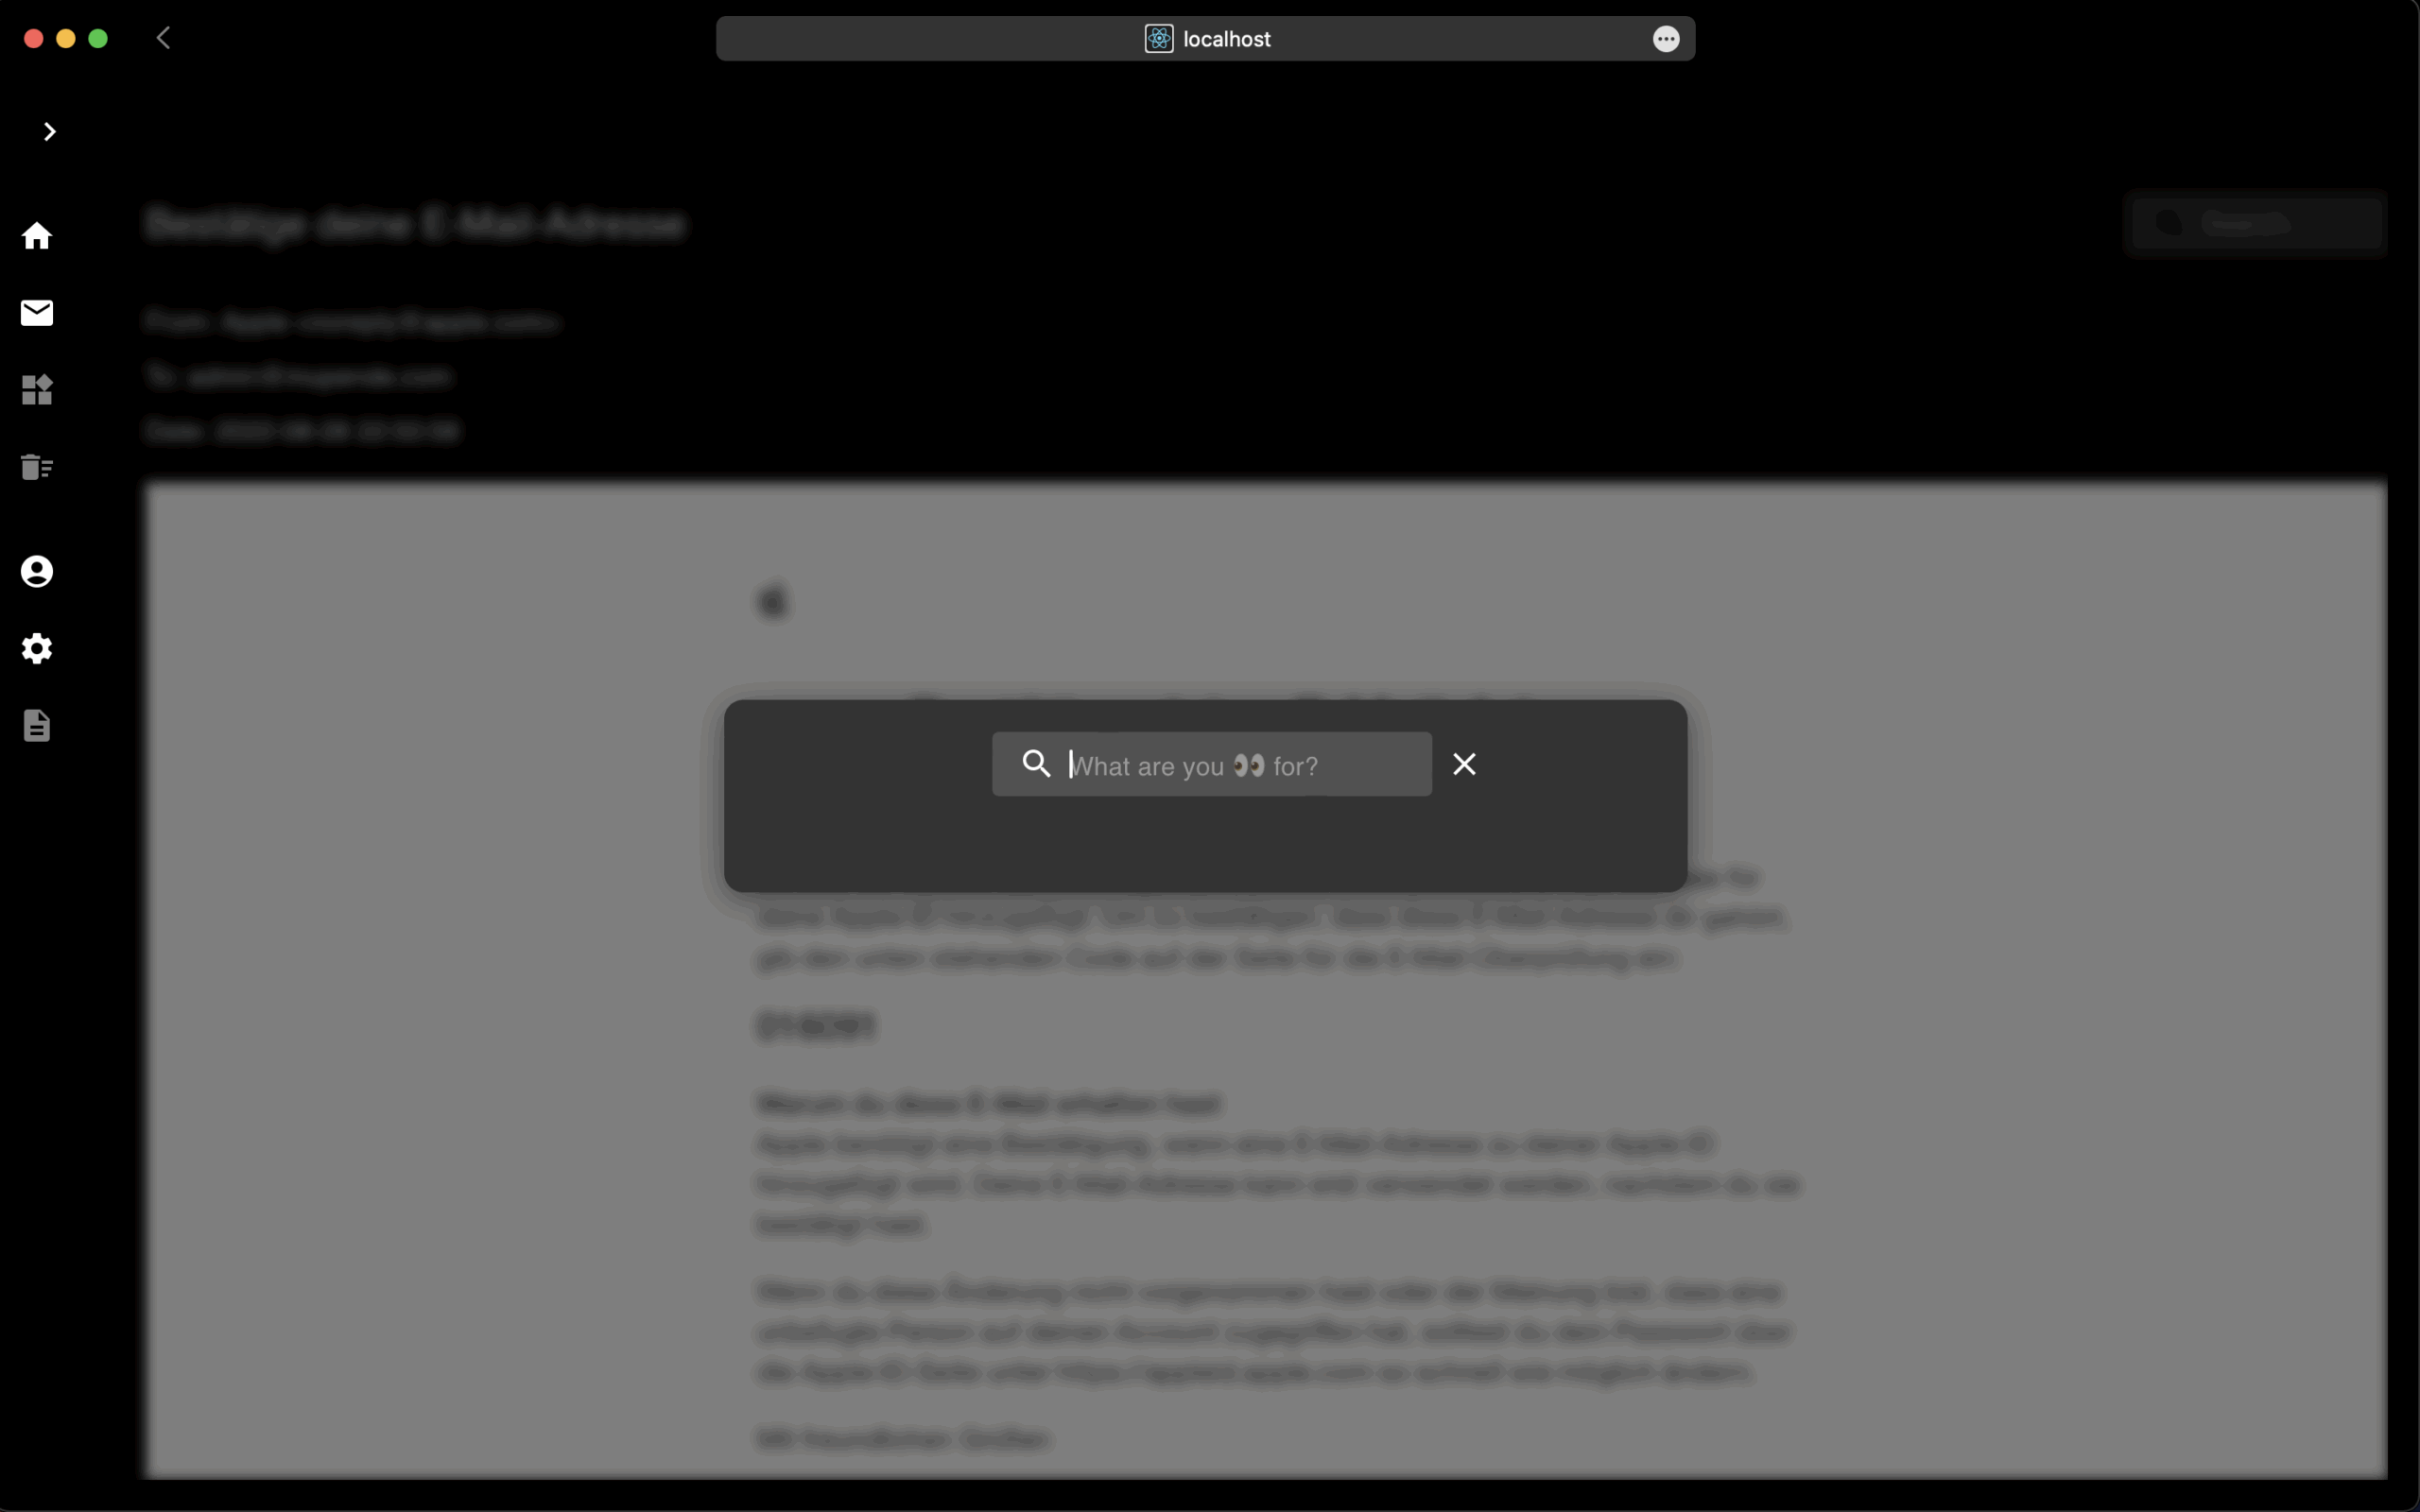
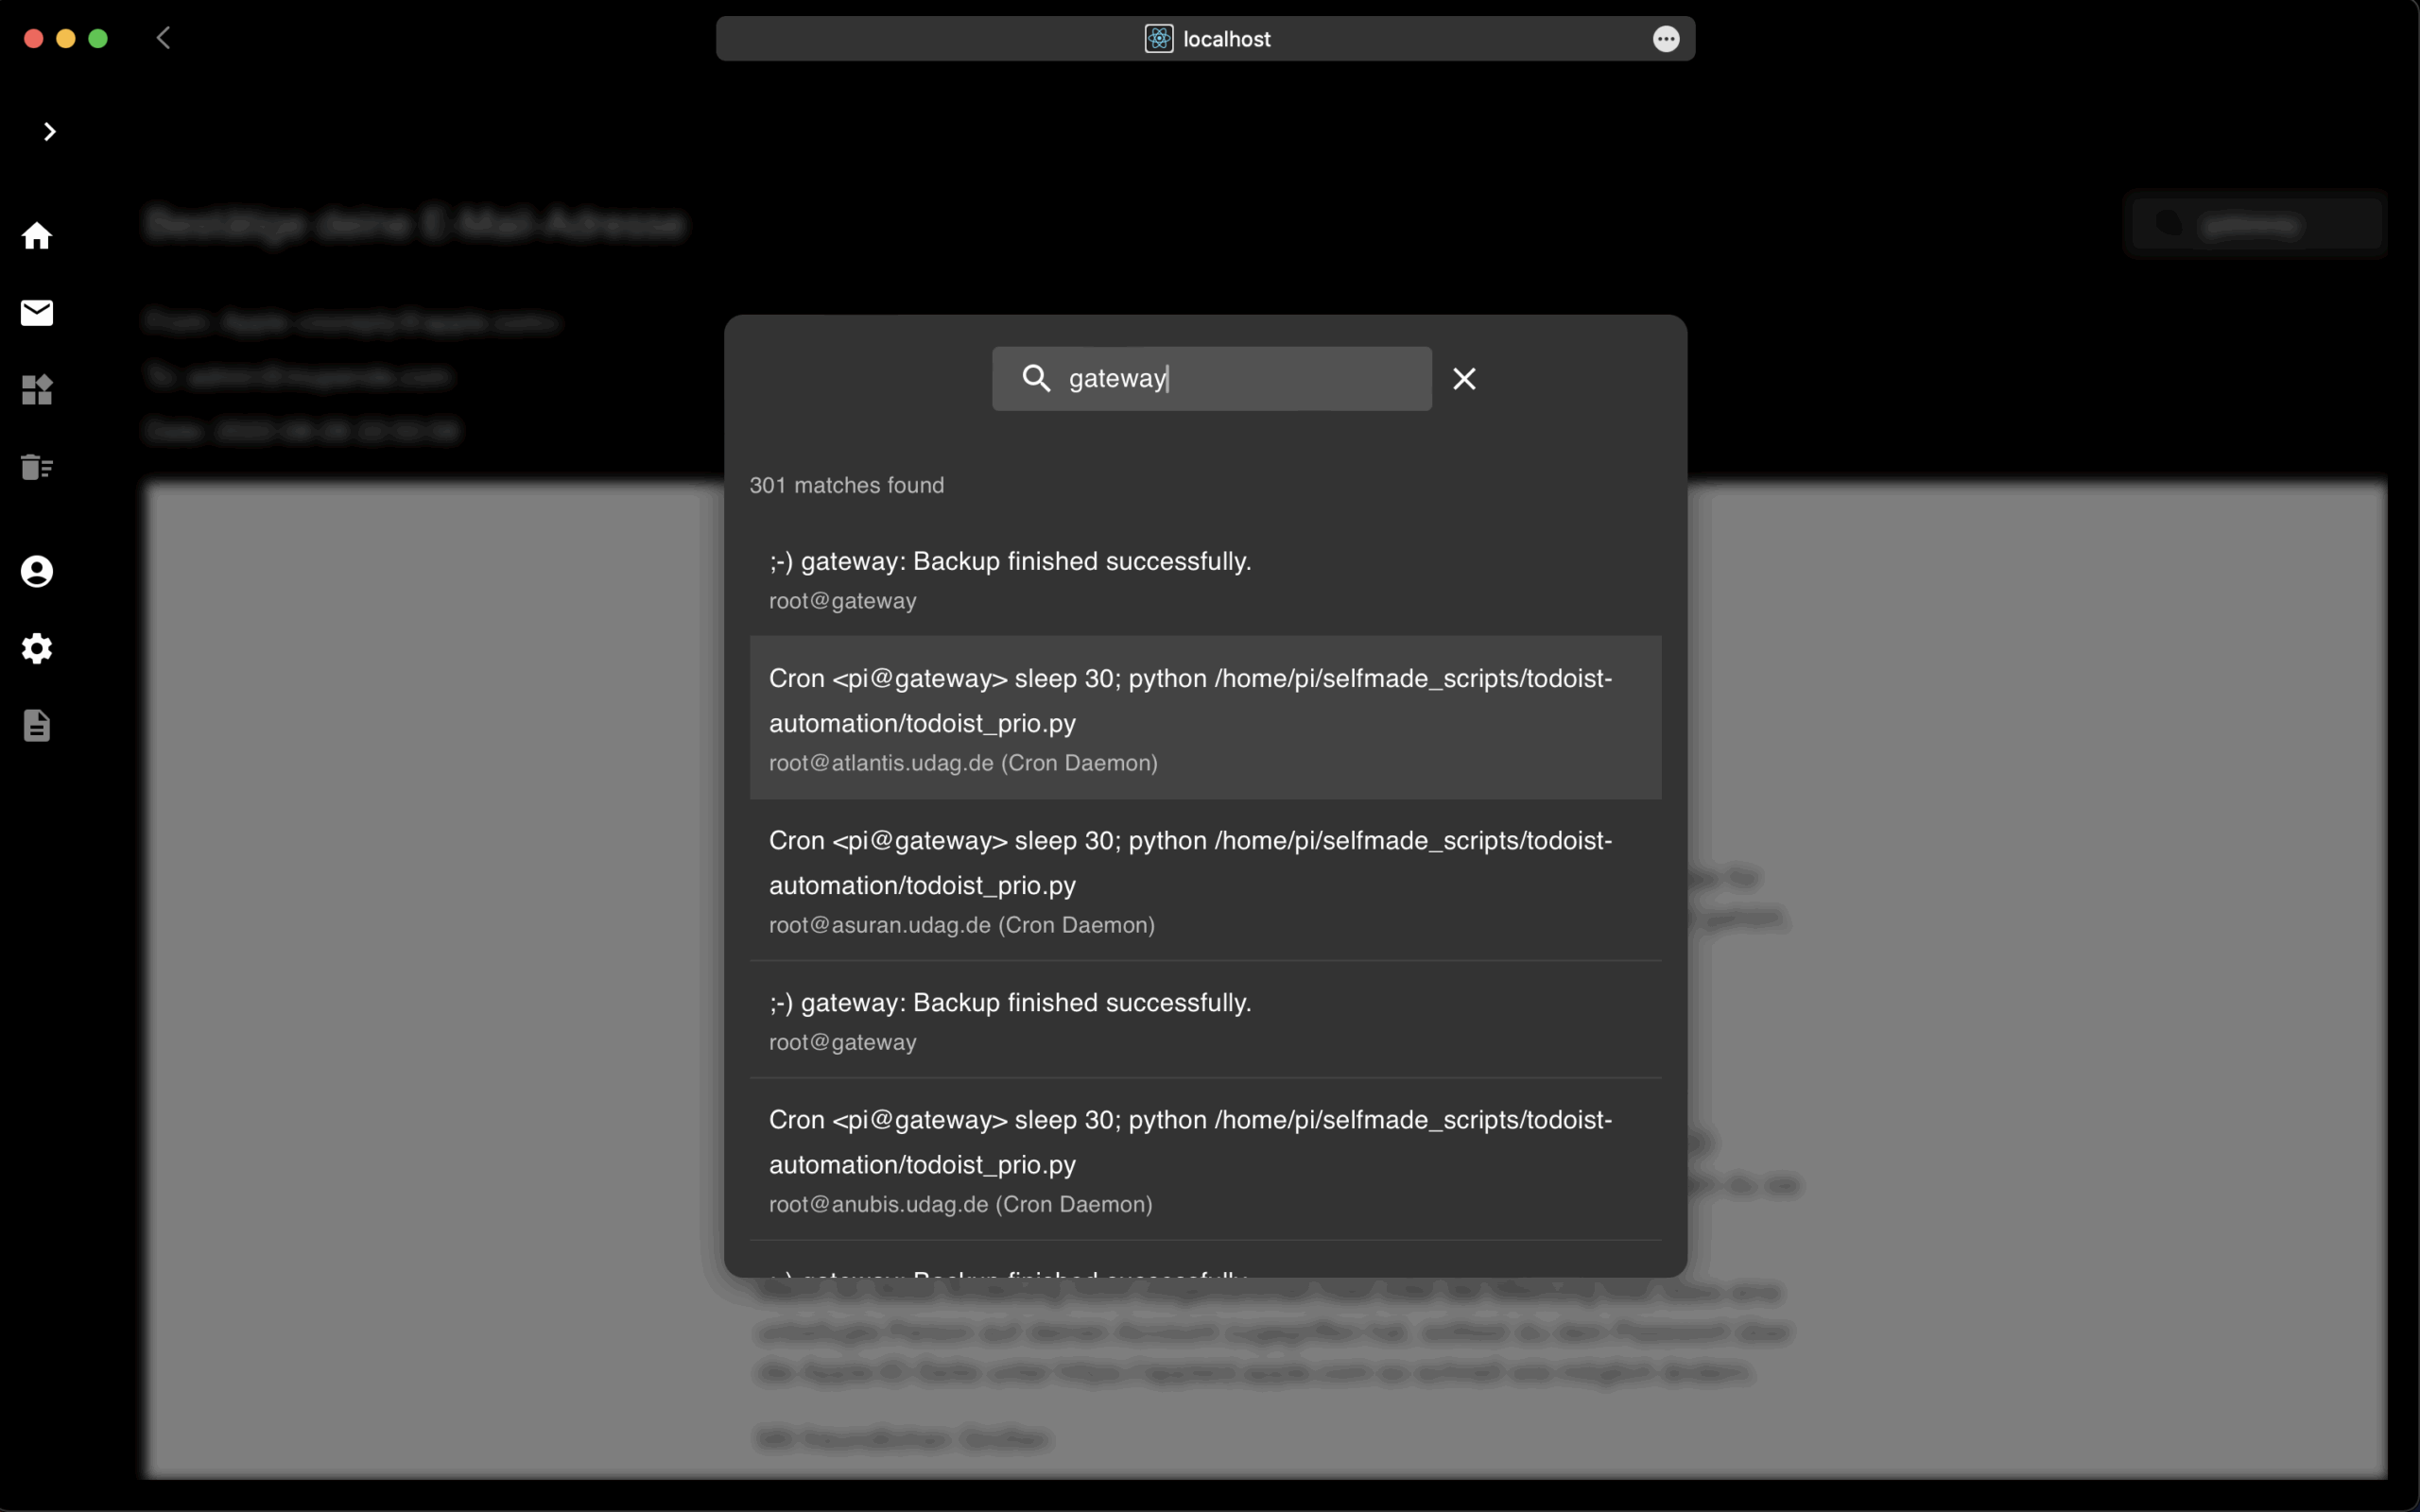
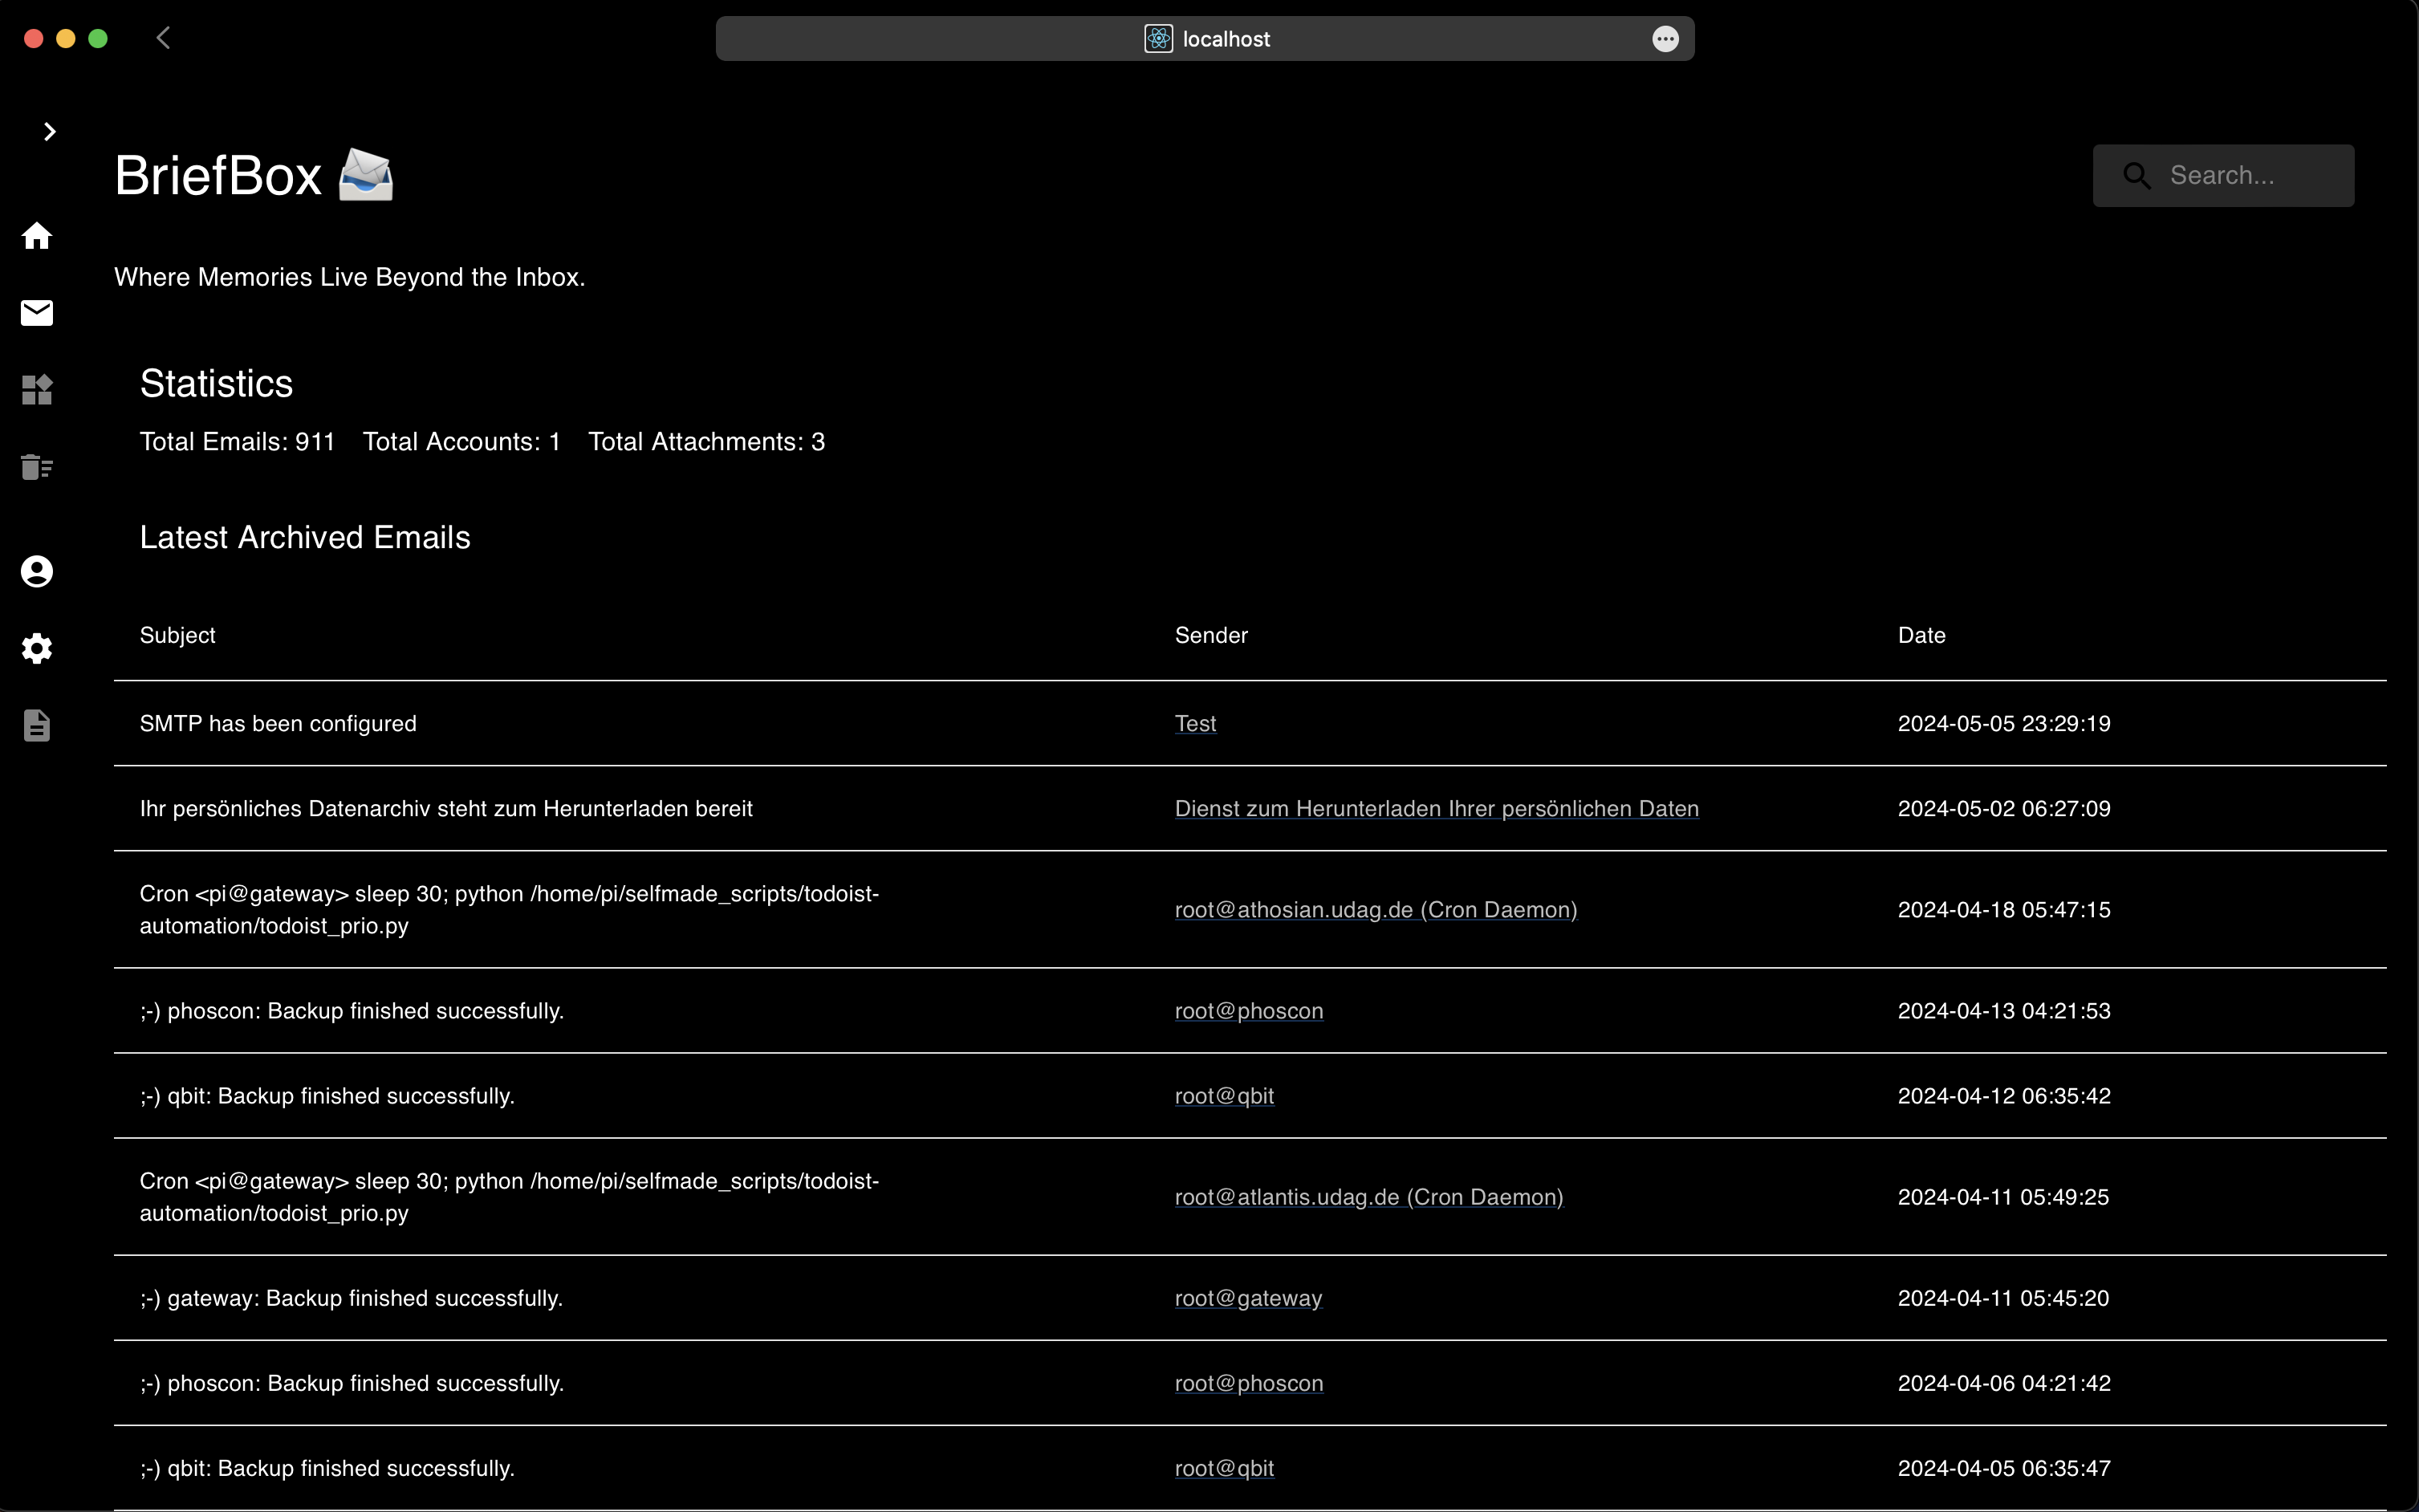
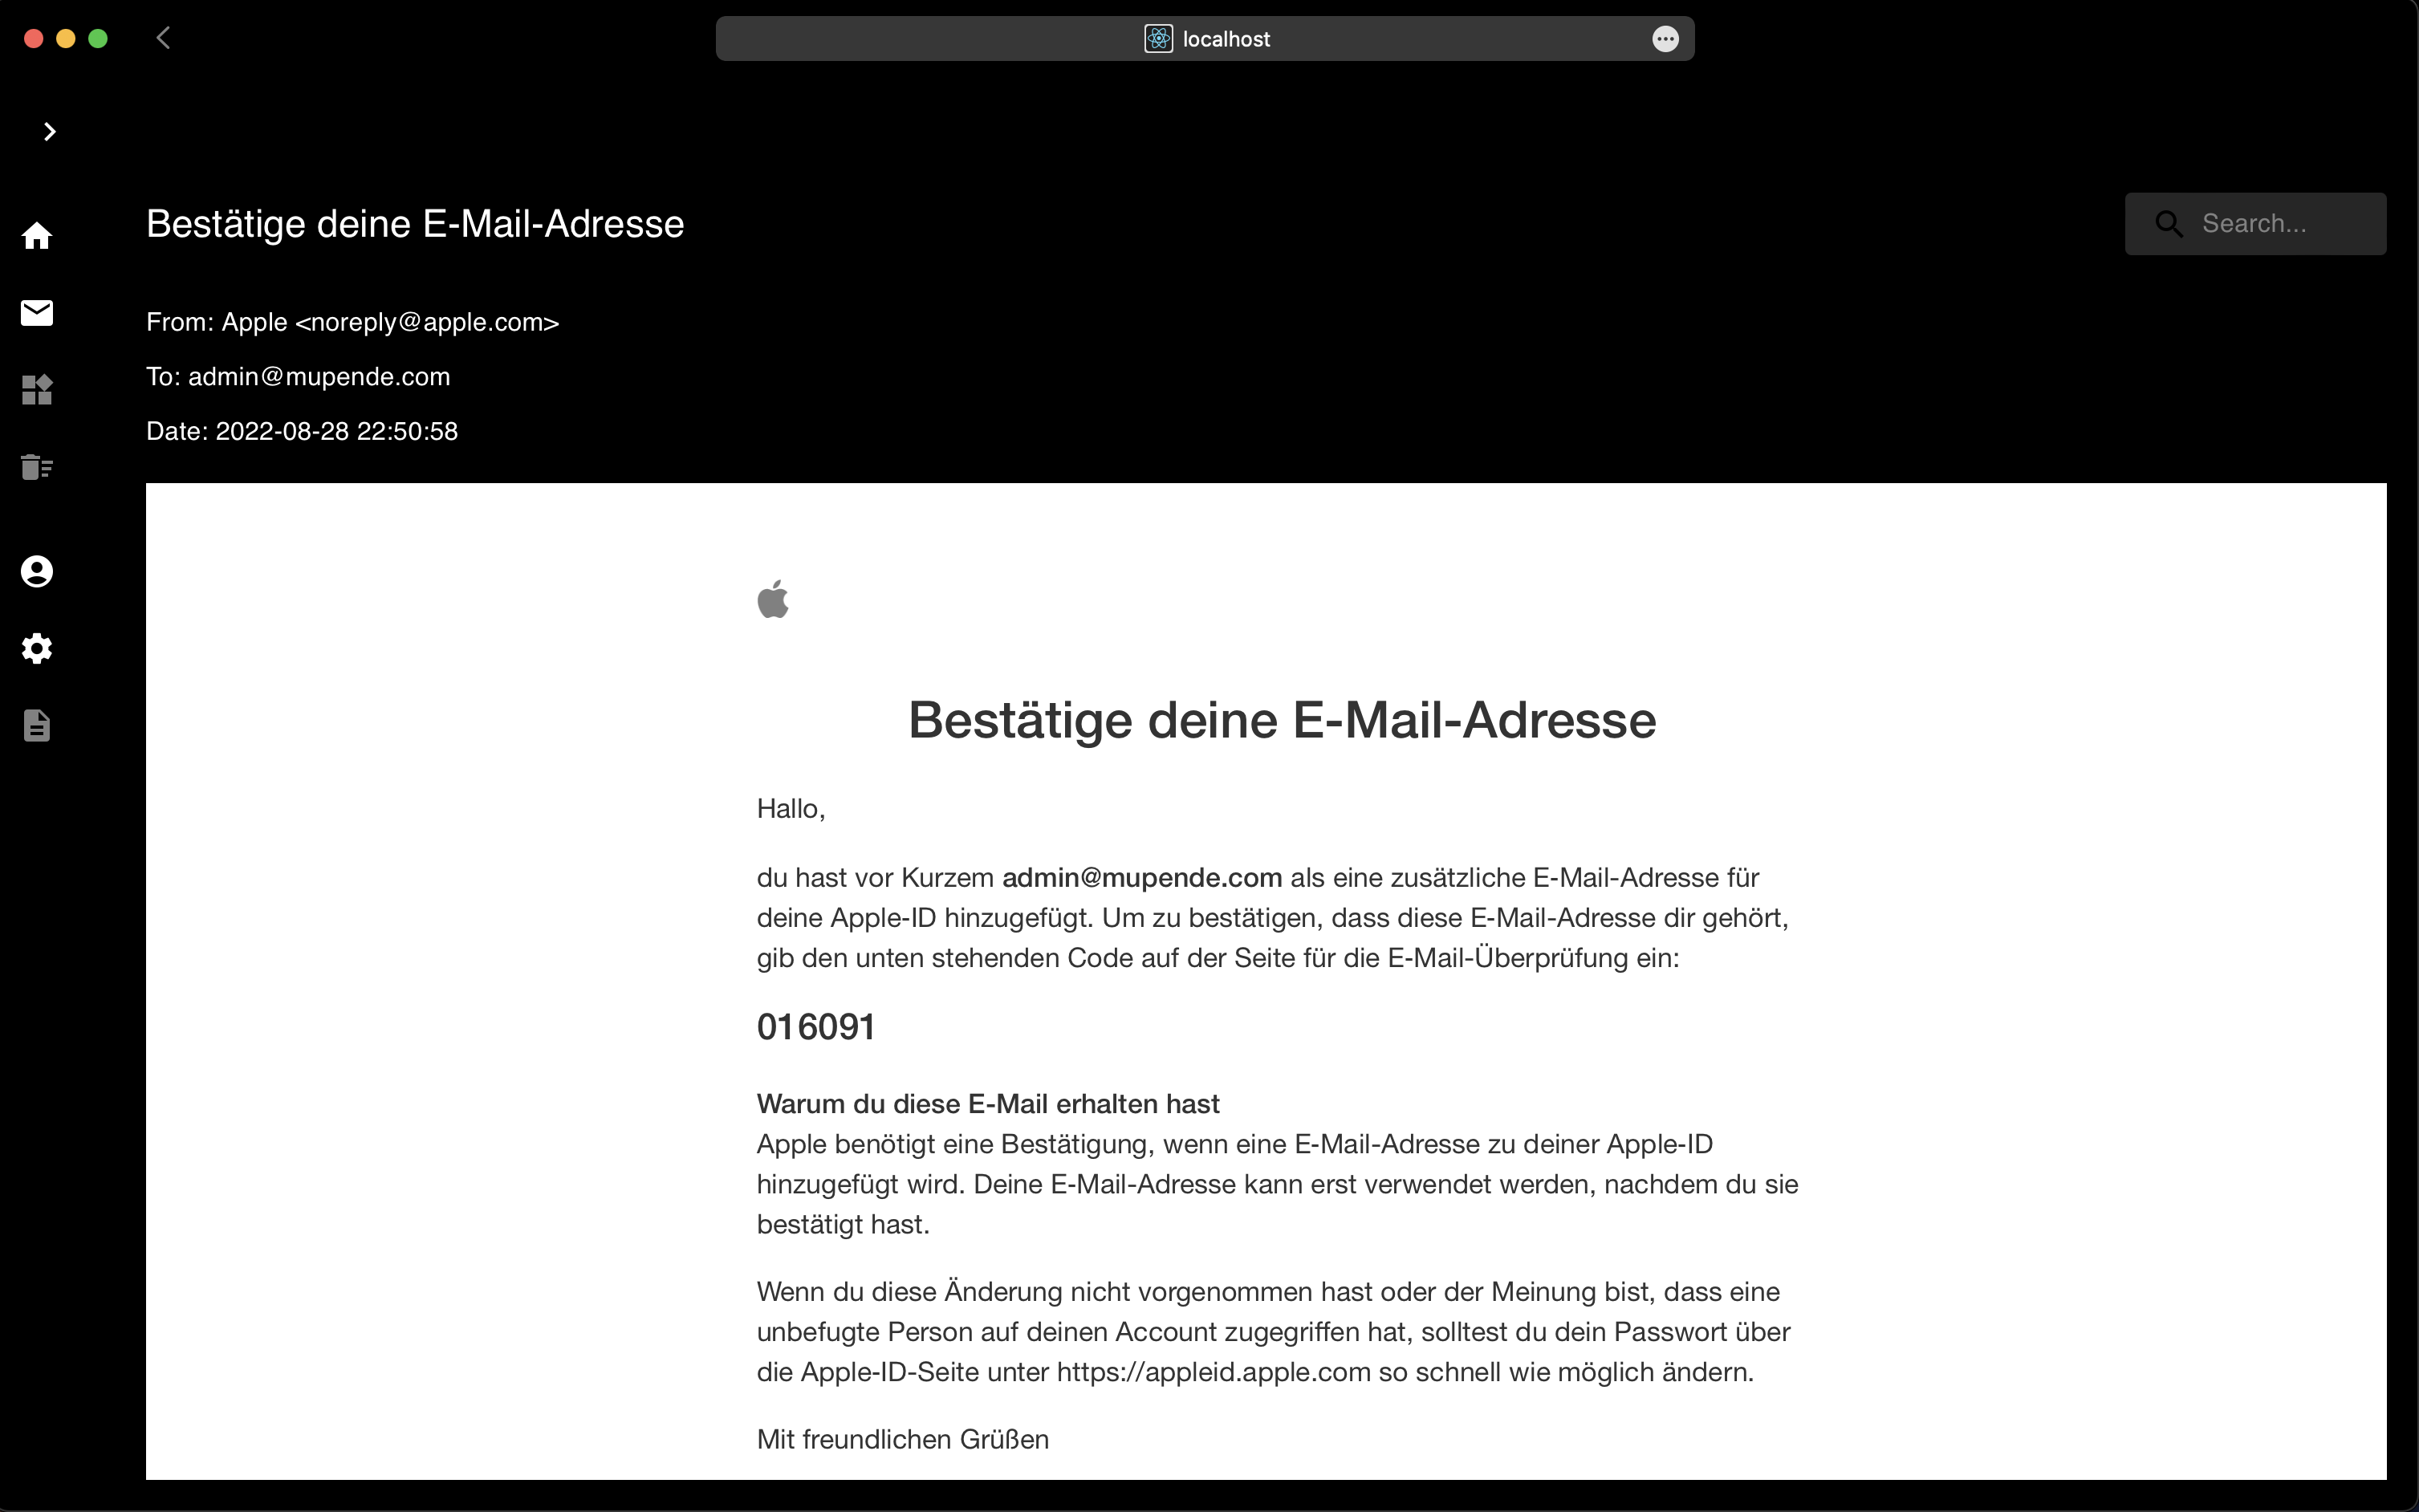
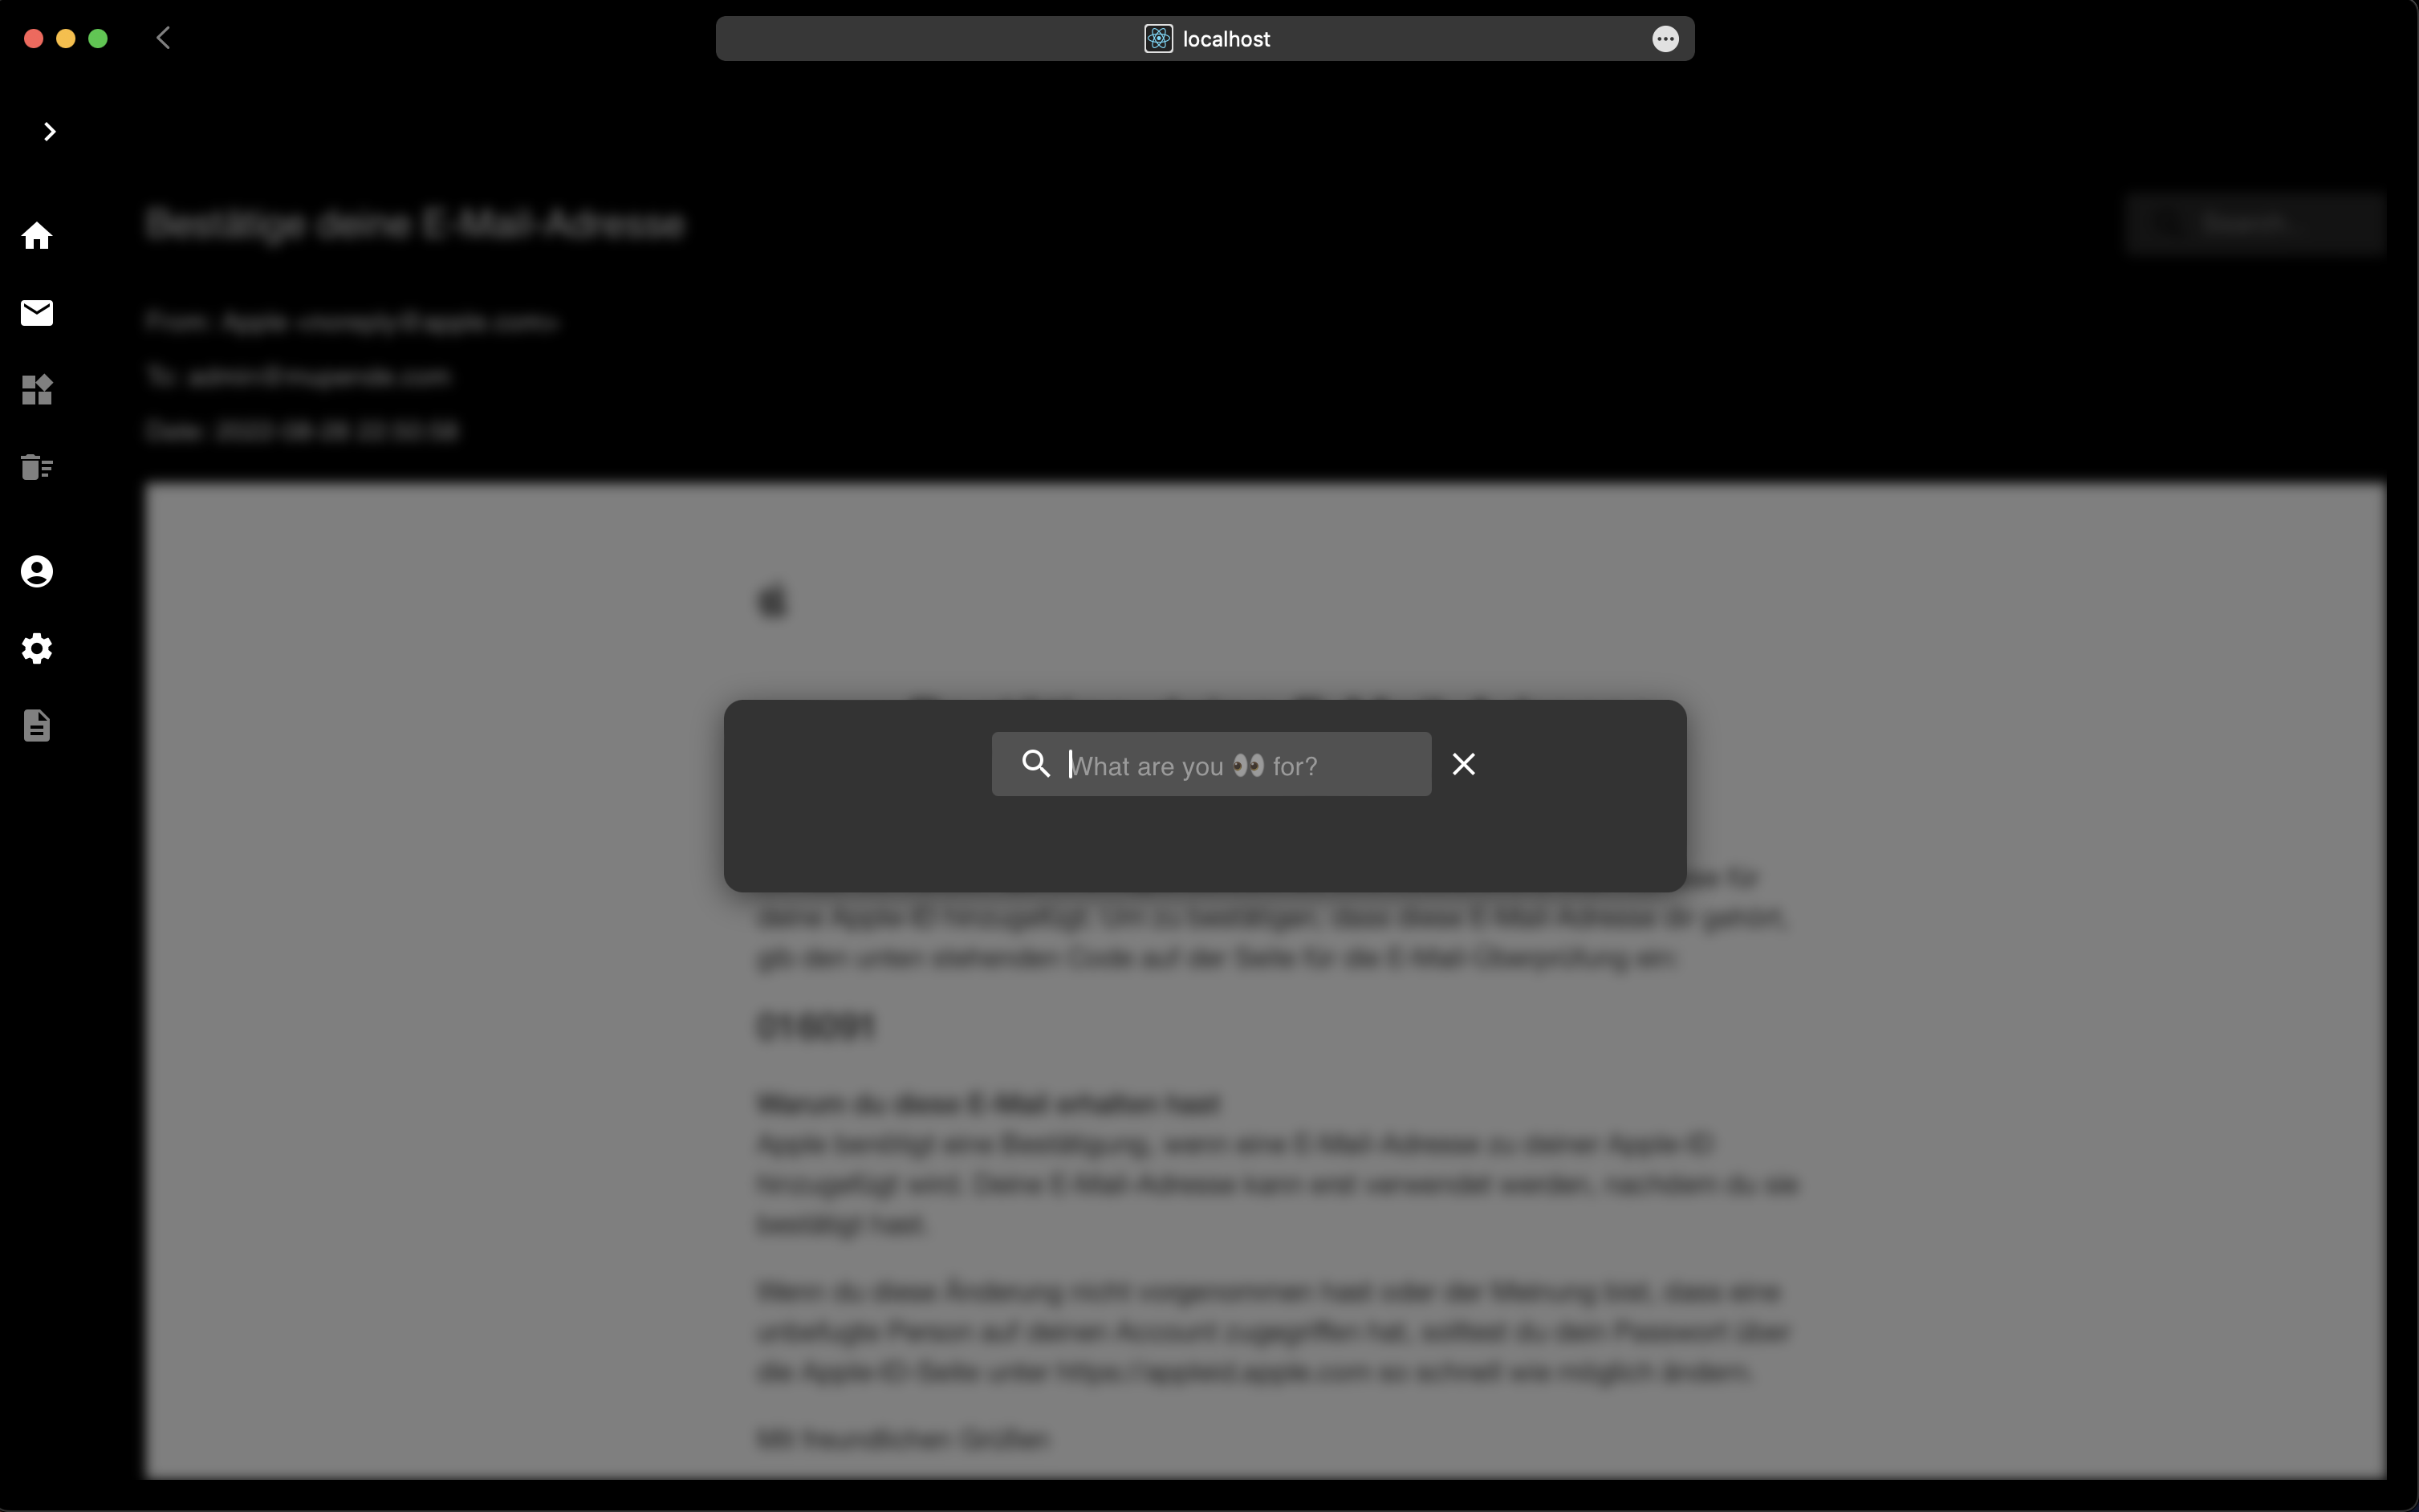
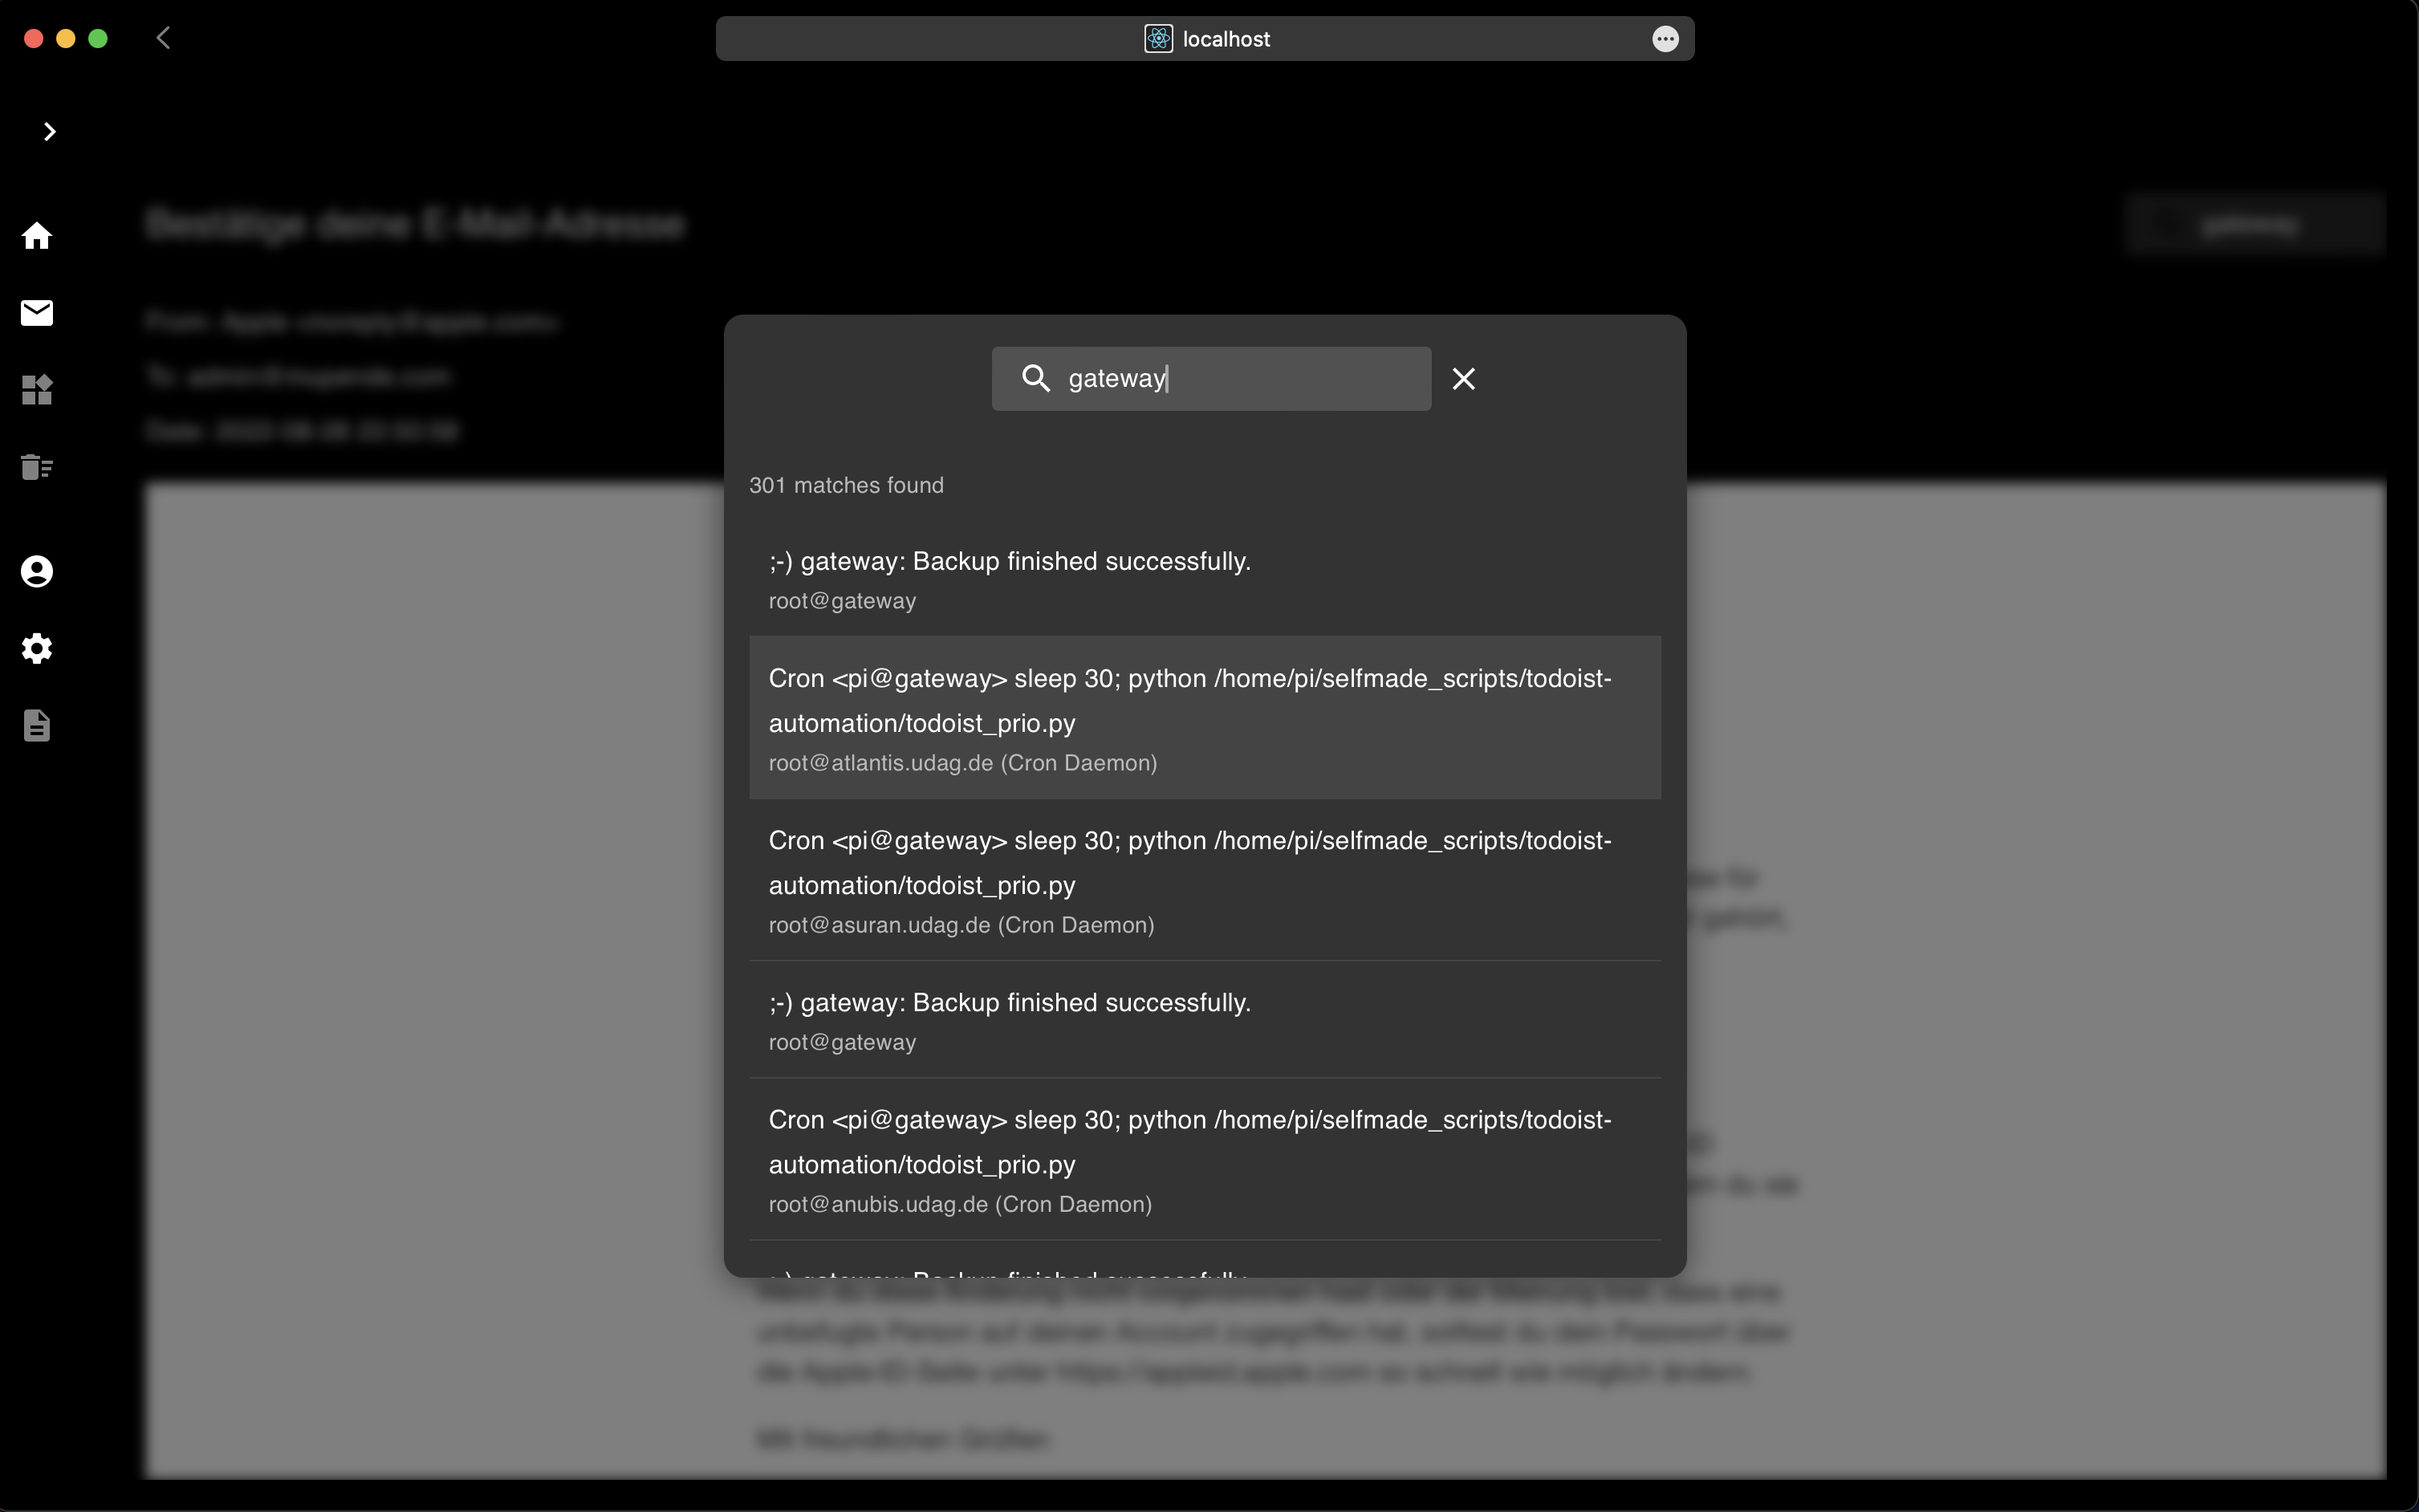
    Briefbox is a tool for archiving emails from multiple IMAP and POP3 accounts. It provides a user-friendly web interface for managing email accounts, searching archived emails, and viewing email details along with attachments. One of the standout features of Briefbox is its advanced search functionality, which allows users to quickly find specific emails using various criteria.

    image image
    image image

    Prerequisites

    • Python 3.x
    • Node.js
    • npm

    Setup and Usage

    1. Clone the repository:

      git clone https://github.com/bandundu/email-archiver.git
    2. Navigate to the backend directory:

      cd email-archiver/backend
    3. Create a virtual environment:

      python -m venv .venv
    4. Activate the virtual environment:

      source .venv/bin/activate
    5. Install the required dependencies:

      pip install -r requirements.txt
    6. Launch the backend:

      python app.py

      The backend will start running on http://localhost:5050.

    7. Open a new terminal and navigate to the frontend directory:

      cd ../frontend/briefbox-front
    8. Install the frontend dependencies:

      npm install
    9. Start the frontend development server:

      npm start

      The frontend will be accessible at http://localhost:3000.

    10. Access the web interface by opening a web browser and navigating to http://localhost:3000.

    11. Use the web interface to add email accounts, search for emails, and view email details.

    Note: I apologize for the inconvenience, but I am are currently working on improving the Docker Compose setup for a smoother deployment experience. In the meantime, please follow the above steps for a bare-metal installation.

    Star History

    Star History Chart

    Visit original content creator repository https://github.com/bandundu/email-archiver
  • School_District_Analysis

    School District Analysis

    Project Overview

    The purpose of this project is to analyze the data of an entire School District, such as funding and student grades, to learn new insights and visually provide clear results on each school’s performance. Additionally, to uphold state-testing standards, this analysis was conduced twice due to potential academic dishonesty among a group of students. The implications of omitting the potentially dishonest data are also discussed.


    Resources

    Resources: All data used in this analysis is found inside of the Resources folder.

    Software: Python 3.7, Anaconda, Jupyter Notebook

    Results

    Due to potential academic dishonesty by the ninth grade students of Thomas High School, this analysis was conducted twice. The first trial of this analysis included the full set of student data. In the second trial of this analysis, the ninth grade students of Thomas High School had their scores omitted from the calculations. The entire ninth grade class of Thomas High School have had their scores replaced with NaN. The DataFrame below is a summary representing the District after replacing the ninth graders’ scores with NaN. district_overview

    • Replacing the ninth graders’ math and reading scores with NaN resulted in the following changes for Thomas High School:

      • The overall passing percentage for Thomas High School fell to 65%
      • The overall passing percentage for the entire district fell to 64.9%
      • Thomas High School was no longer included on the list of top five schools.
    • When the ninth graders’ of Thomas High School had their scores omitted from the calculations, the following changes occured:

      • The overall passing percentages of Thomas High School decreased by 0.11%
      • The average scores of Thomas High School for math and reading increased by 0.06
      • For the spending range of $630-644 per student, the overall passing percentage decreased by 0.1%
      • School rankings are unchanged. Thomas High School is still the second best performing school in the district with an overall passing rate of 90.63% among their tenth through twelfth graders.

    The Effects of School Budget and School Size

    It is found that Average Scores and Passing Percentages do not increase as spending per student increases. In fact, the top performing school in the entire school district (Cabera High School) received $68 less per student than the lowest performing school (Johnson High School). This implies that there are more relevant factors than funding that decide average student scores.

    school_budget_per_student_df

    When considering School Sizes, “Large” Schools (Over 2,000 Students) have the lowest average scores and passing percentages. The difference in performance between “Small” and “Medium” Size Schools is negligible (approximately 1%). Interestingly, all District schools in this dataset are characterized as “Large” schools. This may be an indication that students in this district learn and perform better in smaller, more intimate settings.

    school_size_df

    Charter vs. District Schools

    Charter schools generally performed better than District schools in this analysis. The top five schools with the highest overall passing percentages are all Charter schools, whereas the bottom five are all District Schools. Charter schools in this dataset were typically characterized as “Small” and “Medium” size schools. As seen in the DataFrame below, Charter schools have a 36% higher overall passing percentage than District schools.

    school_type_df

    Average Scores by Grade Level

    After analyzing the average scores for math and reading by grade level for each school, it is found that a students grade level does not affect their scores as much as the school that they attend. The average scores within each school only varries by 1-2% depending on grade level. However, the difference in scores is more apparent when comparing different schools.

    To see the detailed breakdown of Average Math Scores by grade, please click here. Alternatively, if you would like to view the Average Reading Scores by grade, please click here.

    Summary

    Unfortunately, it is not possible to determine the extent of the potential academic dishonesty or identify soecific indivuals to exclude from the dataset. As a consequence of this, the entire ninth grade of students from Thomas High School have had their scores omitted from the results. This is a suboptimal situation because a full set of data is ideal for creating the most accurate results.

    Relacing the ninth graders’ scores with NaN caused Thomas High School’s overall passing percentages and average scores to plummet. The district as a whole has also had its average math and reading scores decrease, as well as the overall passing percentage for students. Furthermore, Thomas High School lost its placement as a top five school within this District. However, after updating the total student counts to exclude the Thomas High School ninth graders and omitting their scores from the dataset, Thomas High School regained its high average scores and retained its position as the number two school in the District. To view the full script, please open PyCitySchools_Challenge.ipynb in Jupyter Notebook.

    Author: Michael Mishkanian

    For all questions and inquiries, please contact me on LinkedIn.

    Visit original content creator repository https://github.com/Mishkanian/School_District_Analysis
  • Job-Finder

    Job Finder

    Job Finder is a web application designed to simplify the job search and recruitment process. It provides job seekers with an easy-to-use platform to find job openings, while also allowing companies to post vacancies, manage applications, and promote their services.

    Job Finder Screenshot

    Table of Contents

    Project Overview

    Job Finder is built with modern web technologies, providing a responsive and user-friendly experience for both job seekers and employers. The application includes features like job listings, user profiles, company pages, and secure authentication.

    Features

    • User Profiles: Create and manage profiles, track job applications, and manage job search activities.
    • Job Listings: Search, filter, and apply for jobs directly through the platform.
    • Company Pages: View detailed company information, job postings, and company culture.
    • Contact Form: Allows users to directly contact the company.
    • Service Pages: Information on various services provided by the company.
    • Secure Authentication: Implemented with JWT for secure login and user management.

    Objectives

    • Simplify Job Search: Create an intuitive platform for job seekers.
    • Streamline Recruitment Process: Provide tools for companies to manage job postings and applications.
    • Enhance User Experience: Ensure a responsive design on both desktop and mobile devices.
    • Implement Robust Security: Secure user data with strong authentication and authorization methods.

    Tools and Technologies

    Front-End:

    • React: Library for building user interfaces.
    • React-Router-Dom: For routing and navigation.
    • Bootstrap: CSS framework for responsive design.
    • Sass: CSS preprocessor for modular styles.
    • Axios: HTTP client for API requests.
    • React-Icons: Icon library for React applications.
    • React-Slick: Carousel component for responsive sliders.
    • React-Chartjs-2: Charting library for data visualization.
    • React-Datepicker: Date picker for forms.

    Back-End:

    • Node.js: JavaScript runtime.
    • Express.js: Web application framework for building APIs.
    • MongoDB: NoSQL database for data storage.
    • Mongoose: ODM for MongoDB.
    • JWT: For secure user authentication.
    • Nodemailer: For sending emails from the server.

    Development Tools:

    • Nodemon: Automatically restarts the server during development.
    • Webpack: Module bundler used by React-Scripts.
    • Jest: Testing framework for unit and integration testing.

    Installation

    Prerequisites

    Make sure you have the following installed:

    • Node.js (v16+)
    • npm or yarn

    Front-End Setup

    1. Clone the repository:
      git clone https://github.com/yourusername/jobfinder.git
    2. Navigate to the project directory:
      cd jobfinder
    3. Install dependencies:
      npm install
    4. Start the development server:
      npm start

    Back-End Setup

    1. Navigate to the backend directory:
      cd jobfinder-backend
    2. Install dependencies:
      npm install
    3. Set up environment variables: Create a .env file in the root of jobfinder-backend and add your variables (e.g., MongoDB URI, JWT secret, etc.).
    4. Start the server:
      npm start

    Usage

    1. Front-End: Access the application at http://localhost:3001 after starting the development server.
    2. Back-End: The backend server will run on http://localhost:3000 by default. Ensure both servers are running to use the full application.

    Folder Structure

    jobfinder/
    │
    ├── public/
    ├── src/
    │   ├── assets/
    │   ├── components/
    │   ├── pages/
    │   ├── services/
    │   ├── styles/
    │   └── App.js
    │
    └── jobfinder-backend/
        ├── src/
        │   ├── controllers/
        │   ├── models/
        │   ├── routes/
        │   └── server.js
        └── .env
    

    Methodology

    The project follows agile development practices with iterative progress and continuous feedback loops. Key phases include planning, design, development, testing, and deployment.

    Challenges

    • Integration of Multiple Libraries: Addressed through compatibility tests and modular development.
    • Authentication and Security: Implemented JWT and used best practices for data protection.
    • Responsive Design: Achieved with Bootstrap and custom media queries.
    • Data Management: Efficiently structured database with MongoDB.
    • User Feedback: Incorporated through iterative UI/UX reviews.

    Future Enhancements

    • Advanced Search Filters: For more precise job search results.
    • AI-Based Recommendations: To provide personalized job suggestions.
    • Enhanced Analytics: To gain insights into user behavior and application performance.

    Contributing

    Contributions are welcome! Please fork the repository and create a pull request with your changes. Ensure your code follows the established style guidelines and is well-documented.

    License

    This project is licensed under the MIT License – see the LICENSE file for details.

    
    ---
    
    This `README.md` provides an extensive overview of your Job Finder project, including setup instructions, features, and technical details. Adjust any sections as needed to match your specific project setup.
    
    Visit original content creator repository https://github.com/Mehar-Aziz/Job-Finder
  • leanote-ios

    Leanote IOS

    Download From App Store

    1. Building

    1.1. Pod install third party libraries

    Leanote for iOS uses Cocoapods (http://cocoapods.org/) to manage third party libraries.

    Run pod install from the command line to install dependencies for the project.

    The current version of CocoaPods is recommended.

    1.2. Run On Xcode

    Launch the workspace by either double clicking on Leanote.xcworkspace file, or launch Xcode and choose File > Open and browse to Leanote.xcworkspace.

    2. Support & Join us

    3. Preview

    4. Acknowledgement

    5. LICENSE

    LICENSE

    LEANOTE - NOT JUST A NOTEPAD!
    
    Copyright 2015 by the contributors.
    
    This program is free software; you can redistribute it and/or modify
    it under the terms of the GNU General Public License as published by
    the Free Software Foundation; either version 2 of the License, or
    (at your option) any later version.
    
    This program is distributed in the hope that it will be useful,
    but WITHOUT ANY WARRANTY; without even the implied warranty of
    MERCHANTABILITY or FITNESS FOR A PARTICULAR PURPOSE.  See the
    GNU General Public License for more details.
    
    Leanote IOS is licensed under the GPL v2.
    
    Visit original content creator repository https://github.com/leanote/leanote-ios
  • xrp-docs

    XRPL

    learn XRP ledger

    Analysis fo the XRP Ledger Consensus Protocol

    The XRP Ledger Consensus Protocol is a previously developed consensus protocol powering the XRP Ledger. It is a low-latency Byzantine agreement protocol, capable of reaching consensus without full agreement on which nodes are members of the network. We present a detailed explanation of the algorithm and derive conditions for its safety and liveness.

    We will be utilizing the XRPLF/xrpl-dev-portal for referencing documentation on XRPL

    XRPL Basics

    /**
     * @file    primitive.js
     * @brief   import the xrpl ledger, used to store 
     *          all transactions and the state of the ledger
     */
     
    
    const xrpl = require('xrpl');
    console.log(xrpl);

    morgan% node primitive.js 
    {
      BroadcastClient: [Getter],
      Client: [Getter],
      Wallet: [Getter],
      keyToRFC1751Mnemonic: [Getter],
      rfc1751MnemonicToKey: [Getter],
      LedgerEntry: [Getter],
      setTransactionFlagsToNumber: [Getter],
      parseAccountRootFlags: [Getter],
      validate: [Getter],
      AccountSetAsfFlags: [Getter],
      AccountSetTfFlags: [Getter],
      NFTokenCreateOfferFlags: [Getter],
      NFTokenMintFlags: [Getter],
      OfferCreateFlags: [Getter],
      PaymentFlags: [Getter],
      PaymentChannelClaimFlags: [Getter],
      TrustSetFlags: [Getter],
      getBalanceChanges: [Getter],
      dropsToXrp: [Getter],
      xrpToDrops: [Getter],
      hasNextPage: [Getter],
      rippleTimeToISOTime: [Getter],
      isoTimeToRippleTime: [Getter],
      rippleTimeToUnixTime: [Getter],
      unixTimeToRippleTime: [Getter],
      percentToQuality: [Getter],
      decimalToQuality: [Getter],
      percentToTransferRate: [Getter],
      decimalToTransferRate: [Getter],
      transferRateToDecimal: [Getter],
      qualityToDecimal: [Getter],
      isValidSecret: [Getter],
      isValidAddress: [Getter],
      hashes: [Getter],
      deriveKeypair: [Getter],
      deriveAddress: [Getter],
      deriveXAddress: [Getter],
      signPaymentChannelClaim: [Getter],
      verifyKeypairSignature: [Getter],
      verifyPaymentChannelClaim: [Getter],
      convertStringToHex: [Getter],
      convertHexToString: [Getter],
      classicAddressToXAddress: [Getter],
      xAddressToClassicAddress: [Getter],
      isValidXAddress: [Getter],
      isValidClassicAddress: [Getter],
      encodeSeed: [Getter],
      decodeSeed: [Getter],
      encodeAccountID: [Getter],
      decodeAccountID: [Getter],
      encodeNodePublic: [Getter],
      decodeNodePublic: [Getter],
      encodeAccountPublic: [Getter],
      decodeAccountPublic: [Getter],
      encodeXAddress: [Getter],
      decodeXAddress: [Getter],
      encode: [Getter],
      decode: [Getter],
      encodeForMultiSigning: [Getter],
      encodeForSigning: [Getter],
      encodeForSigningClaim: [Getter],
      createCrossChainPayment: [Getter],
      parseNFTokenID: [Getter],
      XrplError: [Getter],
      UnexpectedError: [Getter],
      ConnectionError: [Getter],
      RippledError: [Getter],
      NotConnectedError: [Getter],
      DisconnectedError: [Getter],
      RippledNotInitializedError: [Getter],
      TimeoutError: [Getter],
      ResponseFormatError: [Getter],
      ValidationError: [Getter],
      NotFoundError: [Getter],
      XRPLFaucetError: [Getter],
      authorizeChannel: [Getter],
      verifySignature: [Getter],
      multisign: [Getter]
    }

    1. What is XRP?

    /**
     * @file    primitive.js
     * @brief   This file is a simple   
     *          example of how to use the xrpl.js library
     * @param:  none
     * @return: none
     */
    
    // import the xrpl ledger this is the ledger that is used to store all the transactions and the state of the ledger, require is a function that is used to import a module
    const xrpl = require('xrpl');
    
    async function main() {
        // this is the address of the account that we are going to use in order to send a transaction
    
        /**
         * @brief   client is 
         * @param:  server at address 
         *          wws://s.altnet.rippletest.net:51233
         */
        const client = new xrpl.Client("wss://s.altnet.rippletest.net:51233");
    
        /**
         * client.connect() is a promise that resolves when 
         * the connection is established
         */
        await client.connect();
    
        // response is an object that contains the information about the account
        // client.request is a function that is used to send a request to the server
        // paratemers of the request are the command and the account addresss
        const response = await client.request({
            // command is the command that we are going to send to the server
            "command": "account_info",
            // account is a alphanumeric string that is the address of the account
            "account": "rPT1Sjq2YGrBMTttX4GZHjKu9dyfzbpAYe",
            // "validated" is a boolean that is used to specify if we want to get the information from the validated ledger or from the current ledger
            "ledger_index": "validated"
        });
    
        // print the response
        console.log(response);
    
        // disconnect from the server
        client.disconnect()
    
    }
    
    main()
    

    X prefix for non-national currencies in the ISO 4217 standard.

    XRPL (XRP Ledger) is a Distributed Ledger Technology, is a decentralized, public blockchain led by a global developer community. The ledger is owned by Ripple Labs Inc. XRP is a Internationally recognized standarized asset/currency code validated and now compliant by ISO 20022 – ISO 2022 is under SWIFT known to be the Society for Worldwide Interbank Financial Telecommunications which provides a secure messaging system for financial transactions between participating banks. A Currency Code is a code allocated to a currency by a Maintenance Agency under an international identification scheme as described in the latest edition of the international standard ISO “Codes for the representation of currencies and funds”.

    2. What does XRP Stand for?

    XRP is the three-letter currency/asset code formed by appending a single character to a two-letter county code of the issuing country.

    X – Asset

    RP – Ripple Labs

    The X Represents assets not issued by any country, via standarizations XRP is not issued by any country, thus for assets not issued by any country, the first letter must be X. No country codes starting with X will be issued. So, for example, since the chemical symbol for gold is Au, gold’s currency code is XAU. XRP’s first letter is X because XRP is not issued by any country. In the early days, we called the ledger’s native asset “ripples”. So the natural currency code to choose was “XRP”.

    Examples

    1. USD – United States “Dollar”

      Since the United States’ country code is “US”, US dollars have the currency code “USD”.

    2. EUR – European Union “Euro”

      The European Union is a not a country, but still acts as a country code. The EU has the country code “EU”, so the currency code for Euros is “EUR”.

    3. XBT – Bitcoin “Asset”

      Some people use “BTC” for bitcoin, however the formalization standard of bitcoin is actually “XBT”.

    3. What is ISO 20022?

    ISO2022 – Universal Financial Industry Message Scheme

    ISO20022 International Organization for Standardization is a single standarization approach (methodology, process, repository) to be used by all financial standards initiatives. It is a standard/protocol that allows for electronic data to interchange between different financial institutions. In covers financial information transferred between organizations that include credit or debit card transactions, settlement data and securities trading, and other payment transactions. In general the payment protocols and messages across the world are validated by countries and financial networks which all adhere to various standardizations. These standardizations are recognized by the IS) 20022 which bring legacy payment infrastructure to help global interoperabilityy and allow for world’s cross-border payment flows. RippleNet is apart of the ISO 20022 Registrtaion Management Group (RMG) standards body and the first member focused on Distributed Ledger Technology (DTL).

    4. What is SWIFT

    Swift is the global providor of secure financial messaging services and implements cross-border payment systems such as ISO 2022

    What is the Purpose of this Repo

    This is a test repo that will review over the basics of the xrp ledger

    Purpose

    • Find out how to use a local XRP chain
    • Reading and writing to it
    • How to create NFTs on it
    • attestation managers
    • how to swap in and out different chains

    Semantic Remote Attestation Evidence Health Ledger

    A repo that will outline a research project proposal for the XRP

    Semantic Remote Attestation Evidence on Chain

    • health records and ledgers for evidence
    • system and local manisfests
    • Local instances of the XRP ledger.
    • What do we need to download an XRP client.
    • Getting it initialized for the client
    • Lauren wants to do a hackathon with XRP

    Goal

    How to read and write out of the blockchain

    Reference

    Develop a basic understanding of the XRP Ledger’s consensus mechanism.
    Documentation

    Visit original content creator repository
    https://github.com/KU-Blockchain/xrp-docs

  • roadie-backstage-plugins

    This repo contains the Backstage plugins created and maintained by Roadie. Roadie is a SaaS Backstage solution.

    Roadie gives you a hassle-free, fully customisable SaaS Backstage. Find out more here: https://roadie.io.

    Amongst others, the following plugins can be found within this repo:

    Installation instructions for each plugin can be found in their individual README files.

    Backstage is an open platform for creating developer portals. To learn more about the problems it can help solve, please check out our Ultimate Guide to Backstage by Spotify.

    Getting Started

    To get up and running with this repository, you will need to clone it off of GitHub and run an initial build.

    git clone https://github.com/RoadieHQ/roadie-backstage-plugins.git
    cd roadie-backstage-plugins

    Fetch dependencies and run an initial build from root directory

    yarn install
    yarn tsc
    yarn build

    You will be able to see plugins which are already integrated and installed in package.json inside

    cd packages/app

    folder.

    Inside this repository you can add other plugins by running

    // packages/app
    yarn add <<plugin>>

    followed by

    // packages/app
    yarn install

    and running same command in root directory.

    You should be able to run application from root directory, by running

    yarn dev

    Structure of the repository.

    This repository is a place where all of the RoadieHQ plugins we are developed are integrated under /plugins folder. Depending on the type of the plugin they are separated in frontend or backend folder. Please note the scaffolder actions are handled separately. Plugins may be used and/or modified by following steps below:

    Plugins container

    Navigate to

    cd roadie-backstage-plugin/plugins
    cd backend/frontend
    cd selected-plugin

    Plugin folders consist separate unit tests per every plugin, while general e2e tests are written under

    cd roadie-backstage-plugin/packages/app/cypress/integration

    folder.

    Sample service

    In order to make E2E testing isolated from real entities, we have created test-entity.yaml under packages/entitites, which will be shown as sample-service entity when you start the app. This is used only for testing purposes and can be modified accordingly.

    cd roadie-backstage-plugin/plugins
    cd backend or cd frontend
    cd selected-plugin

    Plugin folders consist of separate unit tests for each plugin, while general E2E tests are written under

    cd roadie-backstage-plugin/packages/app/cypress/integration

    folder.

    Community

    • Discord chatroom – Get support
    • Contributing – Start here if you want to contribute
    • Give us a star ⭐️ – If you are using Backstage or think it is an interesting project, we would love a star ❤️

    License

    Copyright 2022 Larder Software Limited. Licensed under the Apache License, Version 2.0: http://www.apache.org/licenses/LICENSE-2.0

    Visit original content creator repository
    https://github.com/RoadieHQ/roadie-backstage-plugins

  • NYSKit

    (logo) NYSKit

    Introduction:

    IOS应用快速构建框架。
    Quick build framework for IOS apps.

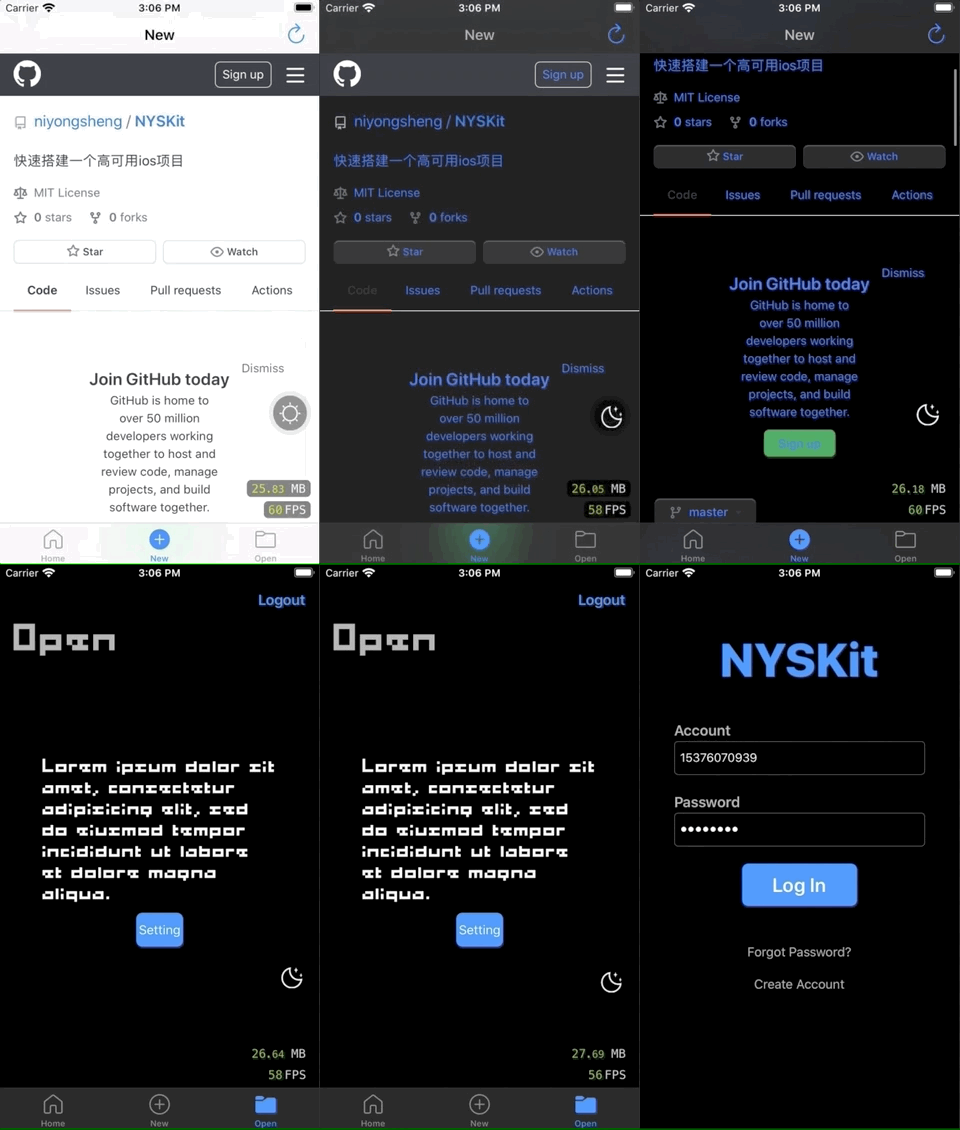
    Screenshot

    image

    Features

    Usage

      pod 'NYSKit', '~> 0.0.7'
      pod 'NYSUIKit', '~> 0.0.7'
    
      pod install
      #import <NYSKit/NYSKit.h>
      #import <NYSUIKit/NYSUIKit.h>
      import NYSKit
      import NYSUIKit

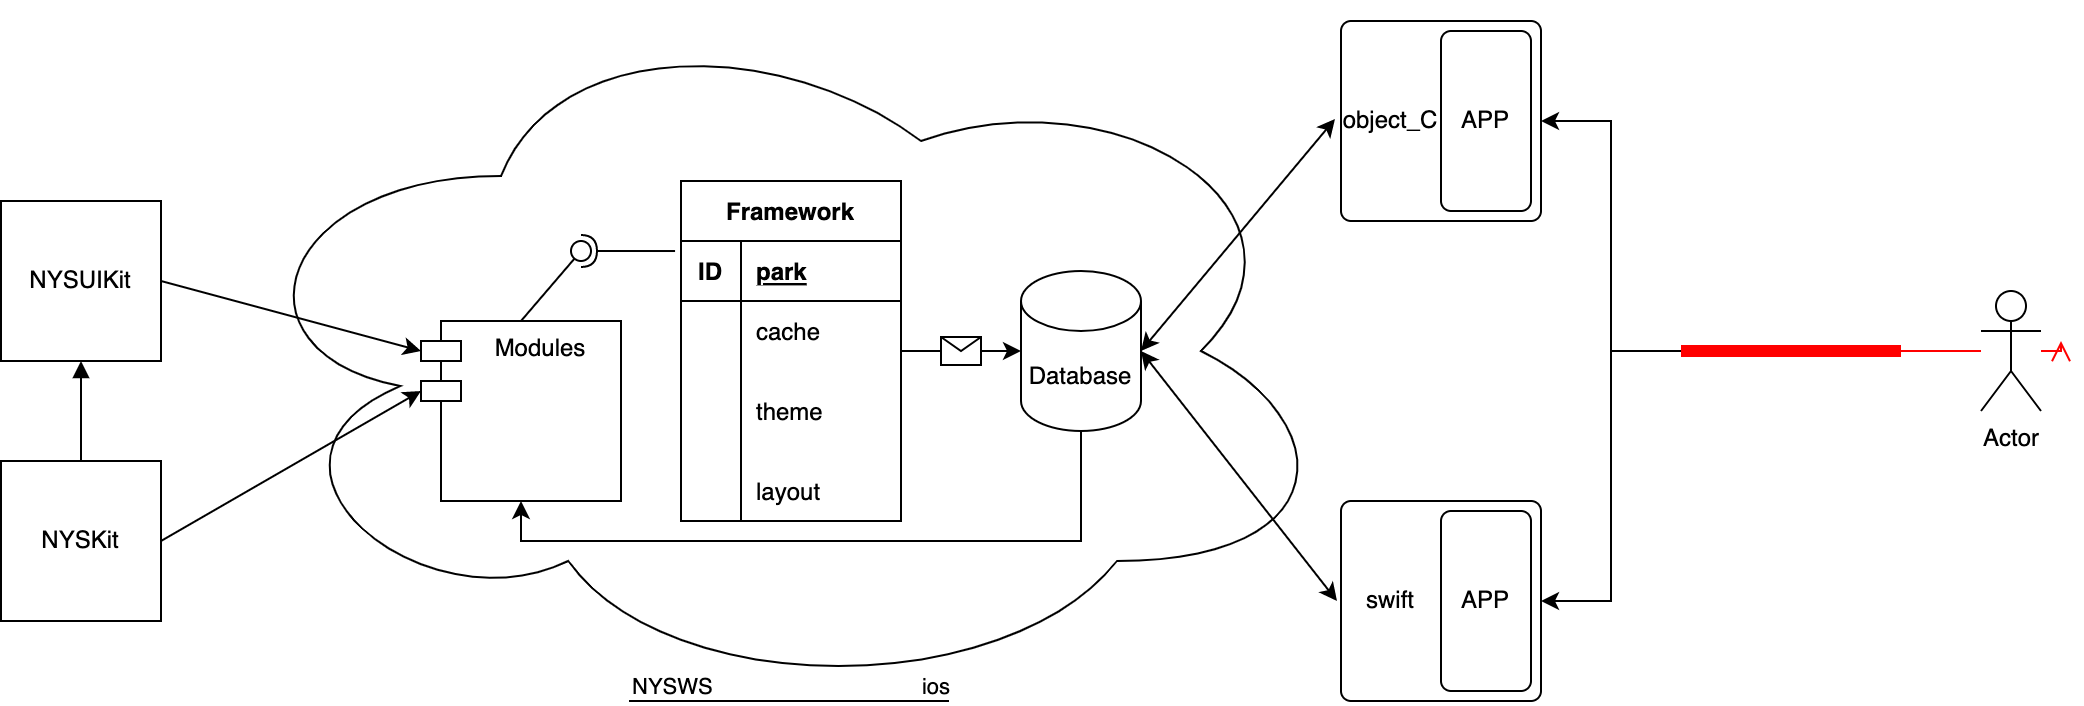
    NYSKit Document: https://niyongsheng.github.io/Document/NYSWS/NYSKit/index.html

    NYSUIKit Document: https://niyongsheng.github.io/Document/NYSWS/NYSUIKit/index.html

    Json Transition:JsonModelFactory

    Example Project:NYSWS

    Architecture

    NYSKit
    ├─ NYSAppStorePay.h
    ├─ NYSAppStorePay.m
    ├─ NYSError.h
    ├─ NYSError.m
    ├─ NYSKeyChain.h
    ├─ NYSKeyChain.m
    ├─ NYSKit.h
    ├─ NYSKitManager.h
    ├─ NYSKitManager.m
    ├─ NYSKitPublicHeader.h
    ├─ NYSNetRequest.h
    ├─ NYSNetRequest.m
    ├─ NYSRSAObjC.h
    ├─ NYSRSAObjC.m
    ├─ NYSRegularCheck.h
    ├─ NYSRegularCheck.m
    ├─ NYSTools.h
    └─ NYSTools.m
    
    NYSUIKit
    ├─ BaseClass
    │    ├─ NYSBaseNavigationController.h
    │    ├─ NYSBaseNavigationController.m
    │    ├─ NYSBaseObject.h
    │    ├─ NYSBaseObject.m
    │    ├─ NYSBasePresenter.h
    │    ├─ NYSBasePresenter.m
    │    ├─ NYSBaseTabBarController.h
    │    ├─ NYSBaseTabBarController.m
    │    ├─ NYSBaseView.h
    │    ├─ NYSBaseView.m
    │    ├─ NYSBaseViewController.h
    │    ├─ NYSBaseViewController.m
    │    ├─ NYSBaseWindow.h
    │    ├─ NYSBaseWindow.m
    │    └─ WebViewController
    │           ├─ NYSJSHandler.h
    │           ├─ NYSJSHandler.m
    │           ├─ NYSWebViewController.h
    │           └─ NYSWebViewController.m
    ├─ Category
    │    ├─ NSBundle+NYSFramework.h
    │    ├─ NSBundle+NYSFramework.m
    │    ├─ NSBundle+NYSLanguageSwitch.h
    │    ├─ NSBundle+NYSLanguageSwitch.m
    │    ├─ NSDictionary+NilSafe.h
    │    ├─ NSDictionary+NilSafe.m
    │    ├─ NSError+NYS.h
    │    ├─ NSError+NYS.m
    │    ├─ NSString+NYS.h
    │    ├─ NSString+NYS.m
    │    ├─ UIButton+NYS.h
    │    ├─ UIButton+NYS.m
    │    ├─ UIColor+NYS.h
    │    ├─ UIColor+NYS.m
    │    ├─ UIControl+NYS.h
    │    ├─ UIControl+NYS.m
    │    ├─ UIImage+NYS.h
    │    ├─ UIImage+NYS.m
    │    ├─ UINavigationController+FDFullscreenPopGesture.h
    │    ├─ UINavigationController+FDFullscreenPopGesture.m
    │    ├─ UINavigationController+NYS.h
    │    ├─ UINavigationController+NYS.m
    │    ├─ UIScrollView+EmptyDataSet.h
    │    ├─ UIScrollView+EmptyDataSet.m
    │    ├─ UITextField+NYS.h
    │    ├─ UITextField+NYS.m
    │    ├─ UIView+NYS.h
    │    └─ UIView+NYS.m
    ├─ Manager
    │    └─ ThemeManager
    │           ├─ README.md
    │           ├─ ThemeManager.h
    │           └─ ThemeManager.m
    ├─ NYSUIKit.h
    ├─ NYSUIKitPublicHeader.h
    ├─ Resources
    │    ├─ NYSUIKit.bundle
    │    │    ├─ Info.plist
    │    │    ├─ en.lproj
    │    │    ├─ es.lproj
    │    │    ├─ ja.lproj
    │    │    ├─ ko.lproj
    │    │    ├─ lao.lproj
    │    │    ├─ zh-Hans.lproj
    │    │    └─ zh-Hant.lproj
    │    ├─ NYSUIKit.xcassets
    │    │    ├─ Contents.json
    │    │    ├─ EmptyData
    │    │    ├─ Refresh
    │    │    ├─ Theme
    │    │    └─ TopBar
    │    ├─ douyuFont.otf
    │    └─ load_error.html
    ├─ UI
    │    ├─ BFPaperCheckbox
    │    │    ├─ BFPaperCheckbox.h
    │    │    └─ BFPaperCheckbox.m
    │    ├─ CMPopTipView
    │    │    ├─ CMPopTipView.h
    │    │    └─ CMPopTipView.m
    │    ├─ LEETheme
    │    │    ├─ LEETheme.h
    │    │    ├─ LEETheme.m
    │    │    └─ LEEThemeHelper.h
    │    ├─ NYSBlugeTabBar
    │    │    ├─ NYSBlugeTabBar.h
    │    │    └─ NYSBlugeTabBar.m
    │    ├─ NYSBubbleButton
    │    │    ├─ NYSBubbleButton.h
    │    │    └─ NYSBubbleButton.m
    │    ├─ NYSFirVersionCheck
    │    │    ├─ NYSFirVersionCheck.h
    │    │    └─ NYSFirVersionCheck.m
    │    ├─ NYSIconLeftButton
    │    │    ├─ NYSIconLeftButton.h
    │    │    └─ NYSIconLeftButton.m
    │    ├─ NYSLabel
    │    │    ├─ NYSLabel.h
    │    │    └─ NYSLabel.m
    │    ├─ NYSLoadingButton
    │    │    ├─ NYSLoadingButton.h
    │    │    └─ NYSLoadingButton.m
    │    ├─ NYSLocation
    │    │    ├─ NYSLocationTransform.h
    │    │    ├─ NYSLocationTransform.m
    │    │    ├─ NYSSystemLocation.h
    │    │    └─ NYSSystemLocation.m
    │    ├─ NYSMemoryLabel
    │    │    ├─ NYSMemoryLabel.h
    │    │    └─ NYSMemoryLabel.m
    │    ├─ NYSPopView
    │    │    ├─ NYSPopAnimationTool.h
    │    │    ├─ NYSPopAnimationTool.m
    │    │    ├─ NYSPopView.h
    │    │    └─ NYSPopView.m
    │    ├─ NYSScrollLabel
    │    │    ├─ NYSScrollLabel.h
    │    │    └─ NYSScrollLabel.m
    │    ├─ NYSTableViewAnimation
    │    │    ├─ NYSTableViewAnimation.h
    │    │    └─ NYSTableViewAnimation.m
    │    └─ YYFPSLabel
    │           ├─ YYFPSLabel.h
    │           └─ YYFPSLabel.m
    └─ Utilities
           ├─ NYSUIKitUtilities.h
           └─ NYSUIKitUtilities.m
    

    Remind

    ARC
    Cocoapods
    iPhone\iPad
    iOS >= 13.0
    Xcode >= 14.0

    Contact Me

    Visit original content creator repository https://github.com/niyongsheng/NYSKit
  • sigma-go

    sigma-go Build Status GitHub release

    Mascot

    A Go implementation and parser of Sigma rules. Useful for building your own detection pipelines.

    Who’s using sigma-go in production?

    Usage

    This library is designed for you to build your own alert systems. It exposes the ability to check whether a rule matches a given event but not much else. It’s up to you to use this building block in your own detection pipeline.

    A basic usage of this library might look like this:

    // You can load/create rules dynamically or use sigmac to load Sigma rule files
    var rule, _ = sigma.ParseRule(contents)
    
    // Rules need to be wrapped in an evaluator.
    // This is also where (if needed) you provide functions implementing the count, max, etc. aggregation functions
    e := sigma.Evaluator(rule, options...)
    
    // Get a stream of events from somewhere e.g. audit logs
    for event := range events {
        if e.Matches(ctx, event) {
            // Raise your alert here
            newAlert(rule.ID, rule.Description, ...)
        }
    }

    Aggregation functions

    If your Sigma rules make use of the count, max, min, or any other aggregation function in your conditions then you’ll need some extra setup.

    When creating an evaluator, you can pass in implementations of each of the aggregation functions:

    sigma.Evaluator(rule, sigma.CountFunc(countImplementation), sigma.MaxFunc(maxImplementation))

    This repo includes some toy implementations in the aggregators package but for production use cases you’ll need to supply your own.

    Visit original content creator repository https://github.com/bradleyjkemp/sigma-go